Home6 Simple WordPress Page Loading Speed Hacks that Work
6 Simple WordPress Page Loading Speed Hacks that Work
WordPress is the most widely used Content Management System (CMS) in the world. The open-source CMS written in PHP was introduced in 2003. It is a powerful and highly customizable platform that can help you build beautiful websites and blogs with ease.
Here are some WordPress facts you should know.
According to W3Tech, WordPress is used by 63.5% of all the websites whose content management system they know. This is 38.3% of all websites. To put things in perspective, WordPress powers a staggering one-third of the internet.
81% of the WordPress websites worldwide use Version 5, which is the latest version released by WordPress.
Contrary to popular belief, WordPress isn’t used only for blogs and static websites—WooCommerce, which is a versatile WordPress e-commerce tool, powers over 28.19% of all online stores. Nearly 22% of the top one million ecommerce sites use WooCommerce.
Many leading brands use WordPress, ranging from The Walt Disney Company and Rolling Stone to Flickr and Georgia State University.
Though WordPress is extremely popular and comes with dozens of benefits, it can sometimes be slow. As a result, most WordPress users have a sluggish website, which can be a significant drawback in a world that wants instant gratification.
Why Your WordPress Site Needs to Speed Up?
Your WordPress site needs to load faster and perform better for various reasons, some of which may impact your business directly. The increasing use of smartphones, mobile data, and growing customer expectations are also demanding better website loading speed on phones.
In the digital world, where websites visitors are highly impatient, a slow-loading website often creates a negative brand impression. A quick-loading website, on the other hand, often makes a positive brand impression. In other words, people are more likely to revisit the latter.
Research shows that the average Time to Interactive (TTI), the time required for the content on your page to become ready for a user to interact with it, is 2.6 seconds in 2020. In other words, if your website takes longer to load, its incoming Web traffic and conversions are more likely to suffer.
According to Unbounce, nearly 70% of consumers admit that page speed impacts their willingness to buy from an online retailer. The same report also states that 81% of marketers know speed influences their conversions, but they’re not making it a priority.
According to the Milliseconds, make Millions study by Deloitte Digital, for every 0.1s site speed improvement, average order value increased by 9.2%, and conversions increased by 8.4% for retail consumers. Bounce rates on product listing pages in retail and travel improved by 5.7% and 5.4%, respectively.
Considering how your WordPress site’s speed is likely to affect your conversions and lead generation, it is necessary to make performance speed your top priority.
Here are six of the most effective WordPress page loading speed hacks.
1. Choose the Right Host
One of the first things you should do is choose the right hosting provider. For many people, sharing hosting often seems like the best and the most affordable option. In shared hosting, multiple websites reside on a server connected to the Web.
As there are multiple websites, the overall cost of server maintenance is shared by the users, bringing it down considerably. However, it comes at the cost of a sluggish website and, in some cases, even frequent downtime.
Furthermore, it isn’t easy to know how well these servers are optimized. As a result, things can get worse during peak traffic hours. In short, to save a few hundred dollars every year, you may be saying goodbye to potential leads worth a lot more.
Some of the best WordPress hosting providers are:
SiteGround
Bluehost
WPEngine
Kinsta
Flywheel
LiquidWeb
2. Use a Caching Plugin
Whether it is an online store or a company website, your website will also grow in size as your business grows. While e-commerce sites add new product pages over time, most company websites add new blog posts, service pages, and campaign-specific landing pages. You may also need to add new plugins.
As your website grows, it may start to slow down, especially during a Web traffic spike. If you use a caching plugin, you can easily overcome this issue.
Whenever you access any webpage on the internet, it leads to a flurry of activity in the backend. It often includes multiple database queries, code executions, and running applications. As your website grows, the amount of this activity also increases, resulting in slower loading speed.
However, a caching plugin helps you create a static version of your content. As it eliminates most of the backend activities, your website loads faster, providing your customers with a better user experience.
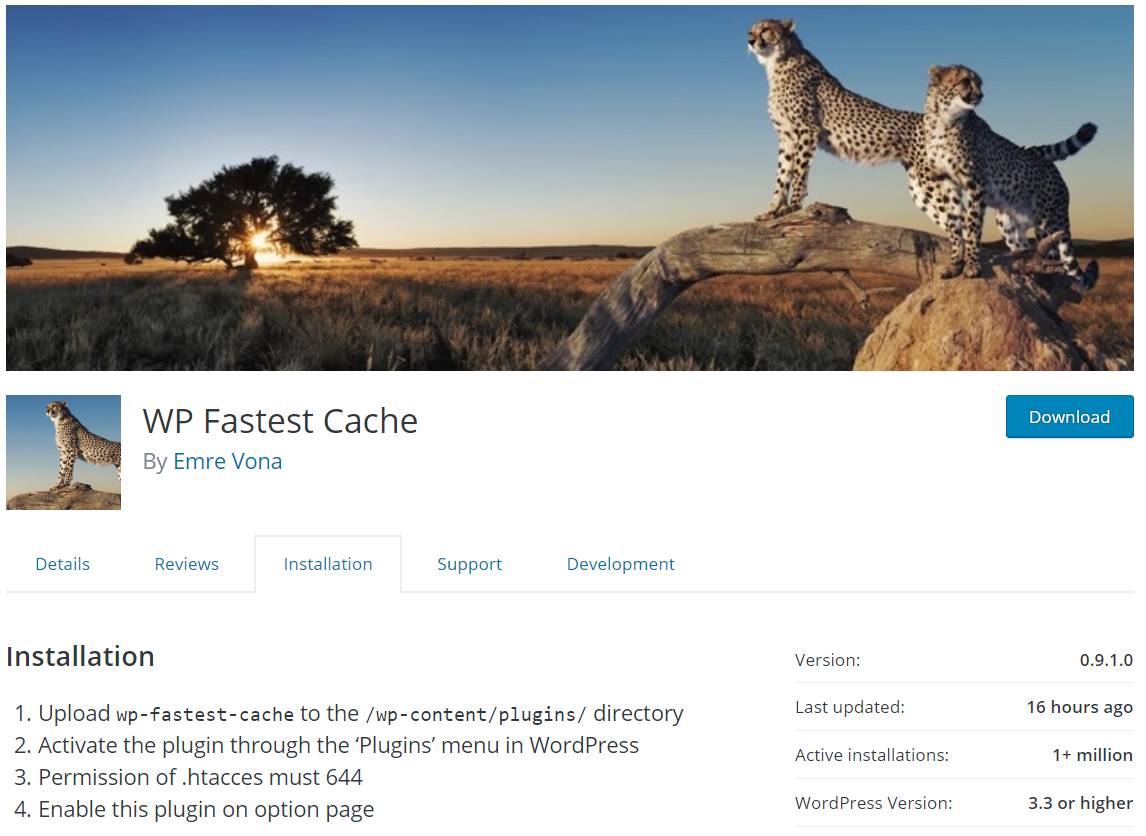
From WP Fastest Cache to W3 Total Cache, you can find plenty of caching plugins for WordPress. Most plugins offer both free and paid versions. For the best results, it’s better to go with a paid version. All you have to do is install and activate the plugin. You can find the installation instructions on the plugin page.
3. Optimize Images
The next obvious step is to reduce the size of images on your WordPress site. As they say, “A picture is worth a thousand words.” That’s why you need to add images, sometimes several of them, to make your content attractive and easy-to-understand.
However, larger images often took longer to load. Also, photos will be the bulk of your webpage size in most cases. As a result, optimizing them can make your WordPress site significantly faster.
Of course, you can optimize the images without a WordPress plugin. Several online tools, like TinyPNG, Kraken, and Compressor, can help you reduce the size of images without compromising the quality.
However, optimizing each image is painfully time-consuming. Fortunately, like everything else, you can find several plugins for image optimization too. Each plugin comes with varying degrees of optimization and other features.
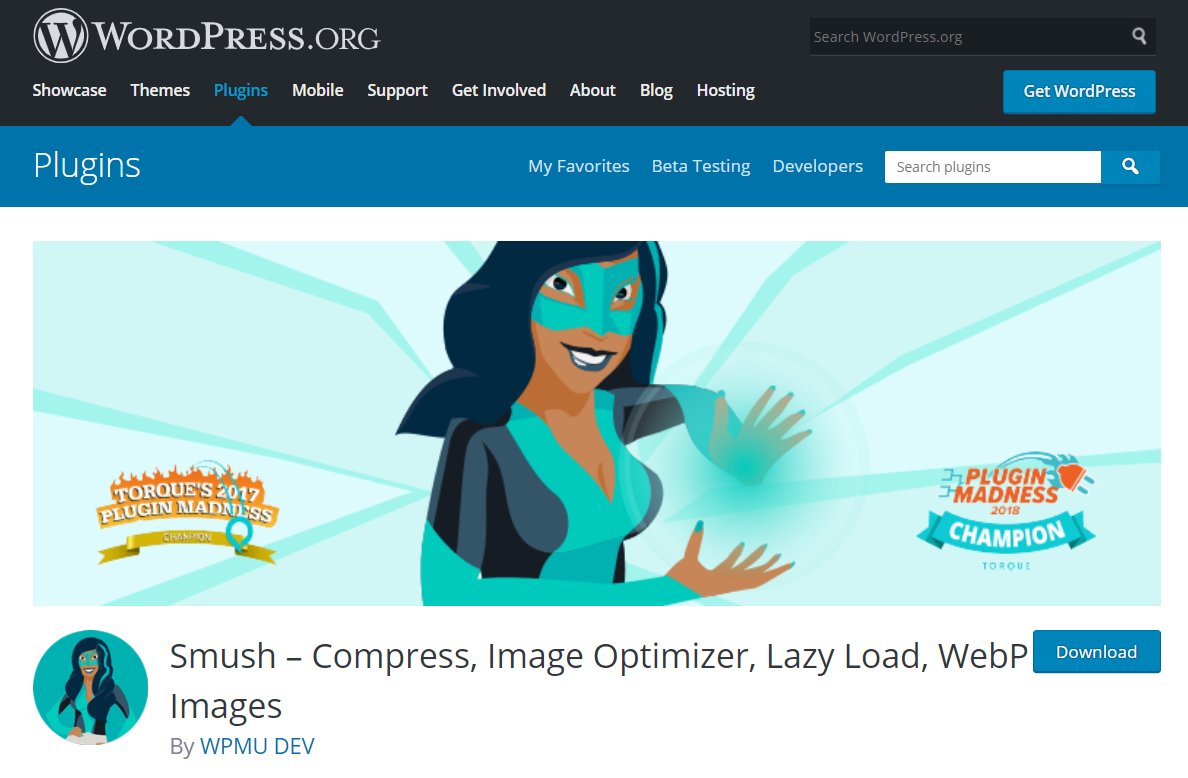
Imagify, Smush, and Short Pixel are some of the top-rated and popular image optimization plugins you can use. Make sure to check out all the features and pricing before downloading a plugin. Some of these plugins also allow you to convert JPG or PNG to next-generation file formats like WebP, JPEG 2000, or JPEG XR.
4. Use a Content Delivery Network (CDN)
Most leading brands with large WordPress sites almost always use a Content Delivery Network (CDN) to boost performance. To understand how this works, you need to know what a CDN is.
In simple words, a CDN is a geographically distributed group of servers that work together to provide your users with faster access to your website’s content. It allows the server closest to the user’s location to serve your website’s static files, including HTML pages, JavaScript files, images, video streams, and CSS stylesheets quickly.
Another significant advantage of a good-quality CDN is that it can protect your website against Distributed Denial of Service (DDOS) attacks. It can also help you reduce bandwidth costs.
In this case, however, using a plugin may not be the best option. While there are a few CDN plugins like BunnyCDN, they aren’t as popular as most CDN service providers.
MaxCDN, which is now StackPath, is one of the best and most recommended CDN service providers for WordPress. Other options include Cloudflare, KeyCDN, and Sucuri. Sucuri offers both CDN and WordPress firewall as well, providing your site with excellent security against cyberattacks. Depending on your budget and business requirements, make sure to choose an easy-to-configure, cost-competitive, secure, and agile CDN service provider.
5. Minifying JS and CSS Files Can Help
Minifying your WordPress CSS and JavaScript (JS) files is also an excellent way to boost WordPress performance and speed. By minifying JS and CSS files, you can get a higher score on Google Page Speed tool. While you can minify JS and CSS files manually, it is better to use a plugin for quicker and more reliable configuration.
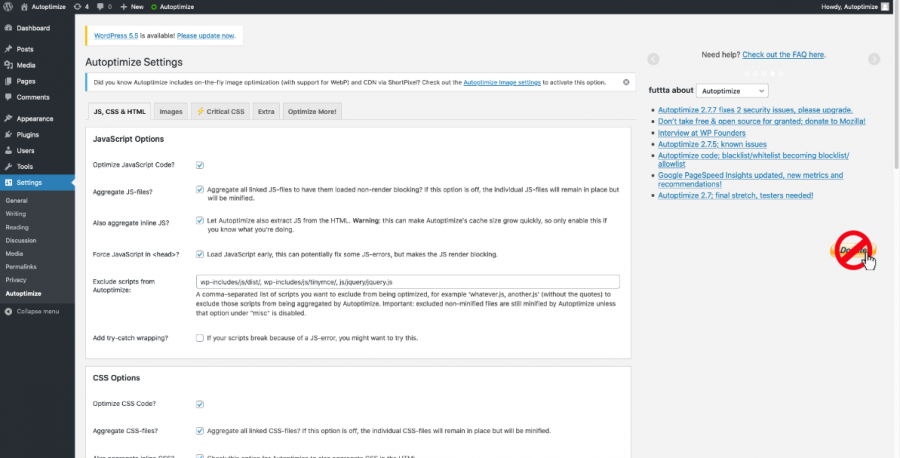
With more than one million active installations, Autoptimize is one of the best and longest-running plugins for minifying JS and CSS files. Once you have downloaded and installed the plugin, go to the Settings menu to configure it. Select all three JavaScript, CSS, and HTML options to minify all these files.
JavaScript Options
When you check the “Optimize JavaScript Code” option, Autoptimize will minify your JavaScript files. You can enable all other options for JS minifying. However, turning on the “Force JavaScript in <head>” option is usually not recommended.
It can lead to render blocking elements that can slow down your site. You should exclude the scripts of files that you need to load in the <head> element of your site’s HTML. You should also uncheck the “minify excluded CSS and JS files” box in the “Misc Options” to prevent the excluded scripts from minifying.
CSS Options
In this section, you should keep the “Also Aggregate Inline CSS” box unchecked. When enabled, it will move inline CSS to a browser-cacheable CSS file, which may reduce the page size.
You should also see if enabling the “Generate Data: URIs for Images” option increases your loading speed. If the impact is substantial, you can check this box. Otherwise, you can leave it disabled.
HTML Options
Checking the “Optimize HTML Code” box will reduce the whitespace in your HTML code. However, make sure to optimize your HTML code thoroughly before turning this option on as it may cause glitches in some cases. If you want to keep HTML comments for your optimized pages, enable the “Keep HTML Comments” option.
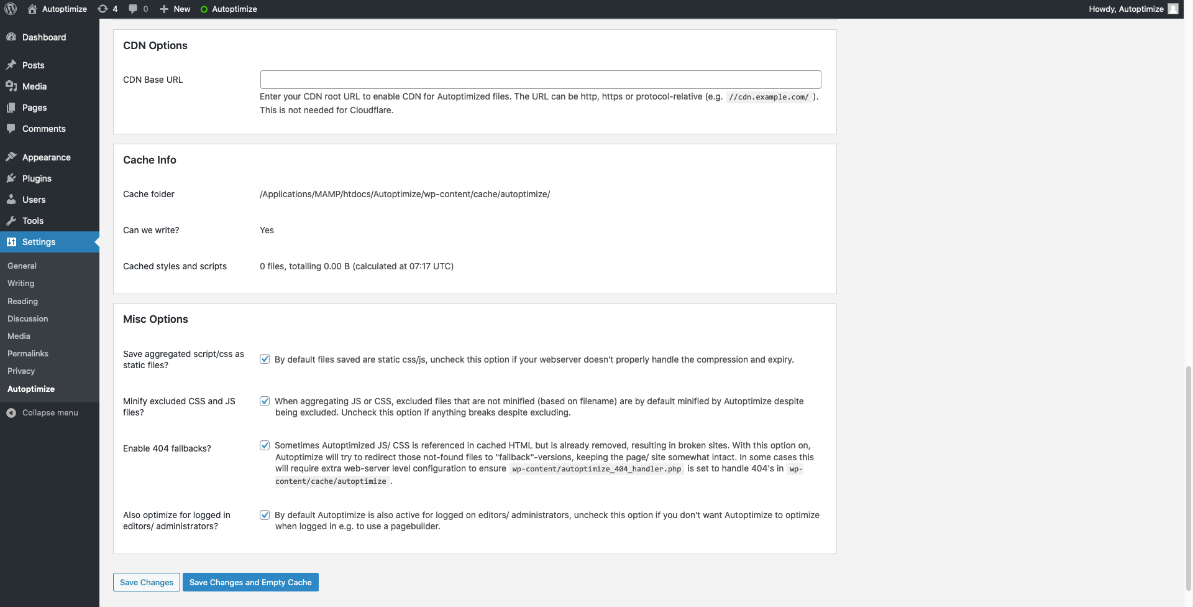
CDN Options
In this option, you will need to add the CDN URL provided by your CDN provider such as StackPath. Kinsta, and KeyCDN. However, Cloudflare doesn’t provide an URL. If you are using it, you needn’t configure this section.
Misc Options
It comes with a few miscellaneous options that you may have to enable. It is often recommended to check all the boxes in this section to optimize the site’s performance.
However,
If your server can’t handle file compression and expiry, disable “Save Aggregated Scripts/CSS as Static Files”
If there are minification-related issues, disable “Minify Excluded CSS and JS Files”
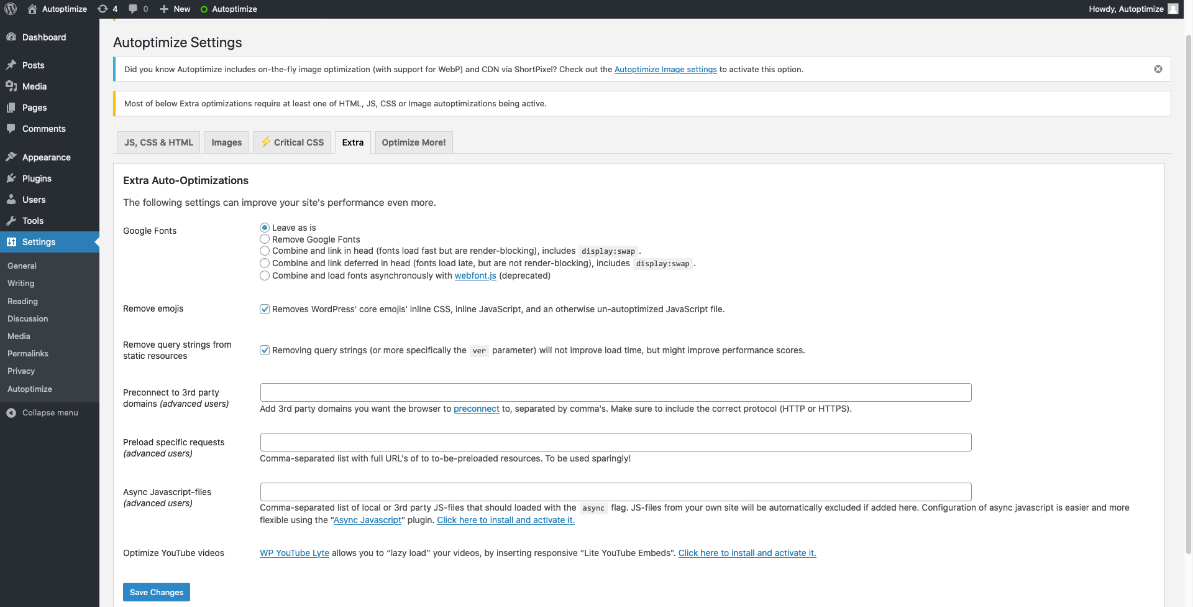
Extra Auto-Optimizations
This section lists additional settings for speed optimization. You can test the last three options in this section to see which one results in a higher speed. You can use Google Page Speed tool to check the results.
You can enable “Remove Emojis” as it can reduce your page size by removing CSS and JS related to WordPress core emojis. You should also enable “Remove Query Strings from Static Resources” to improve the performance of WordPress core.
Enabling “Preload Specific Requests” allows your browser to download an asset quickly, while with the “async JavaScript files” option, you can specify certain external JavaScript files to load using the <async> HTML flag asynchronously.
Images Optimization
With these settings, you can make images load faster. Autoptimize can also generate and serve WEBP versions the images. While enabling lazy loading is a good idea for image-heavy pages, some users may find the constant image loading annoying. Google, however, recommends it.
Critical CSS
This option is available with the premium version. When you enter your Critical CSS API Key into the “Critical CSS” option, the plugin will automatically create critical CSS rules. These rules make sure pages render before the full CSS is loaded, which in turn, boosts loading speed.
6. Optimize Your Database
Optimizing your WordPress database can also help you speed up and boost performance. You can delete spam comments, fake users, orphaned images, and old versions of your content using a plugin. WP-Optimize is one of the best plugins for this job.
Although both free and paid versions are available, it is better to go for the paid version if you want to use advanced features. These include setting up automatic optimization, deleting unused and unwanted images, and greater flexibility and control than the free version.
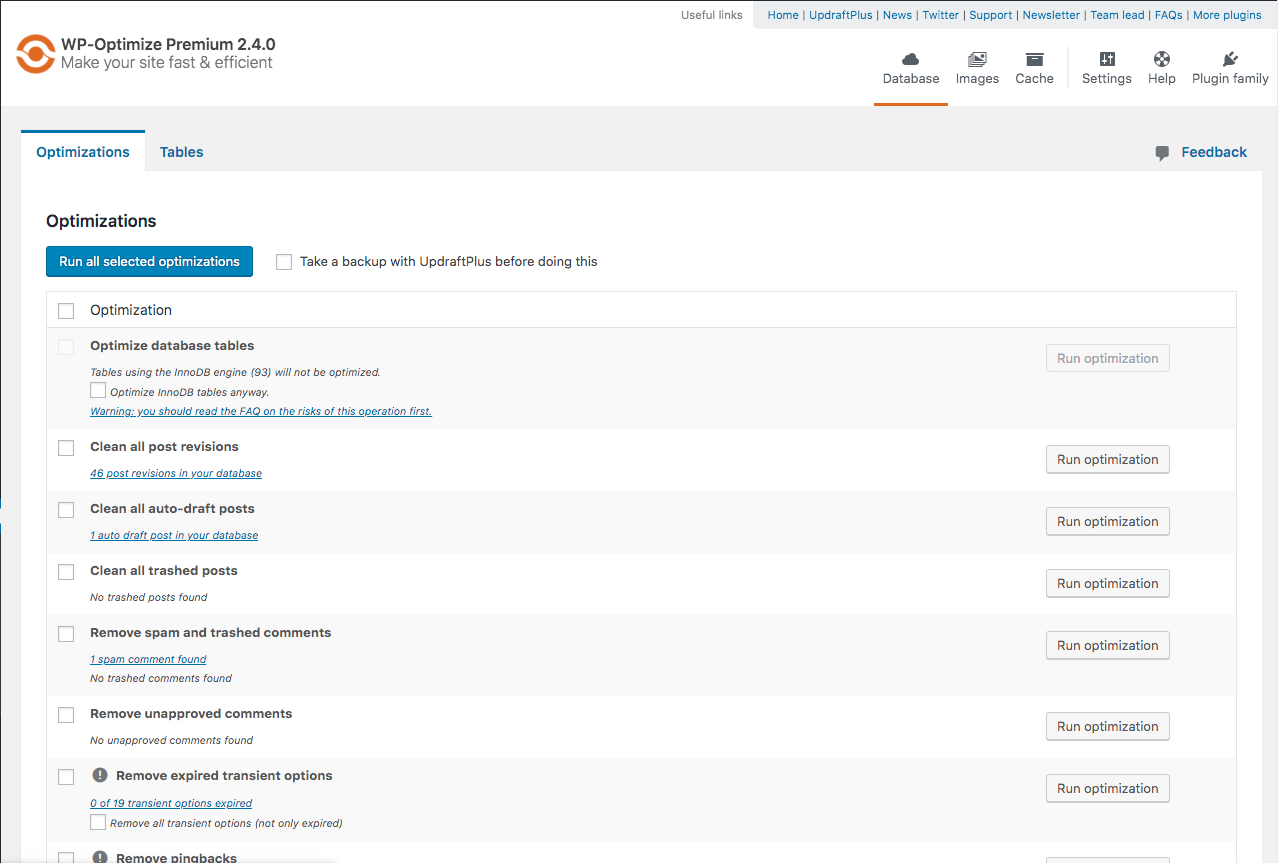
Once you have installed and activated the plugin, go to the Database tab. Select the Optimizations menu, where you will see different optimization options. Under each option, you will also see the details of what WP-Optimize has found.
For example, in this screenshot, you can see “46 post revisions in your database” under the “Clean all post revisions” option. You can select appropriate options and run the optimization process.
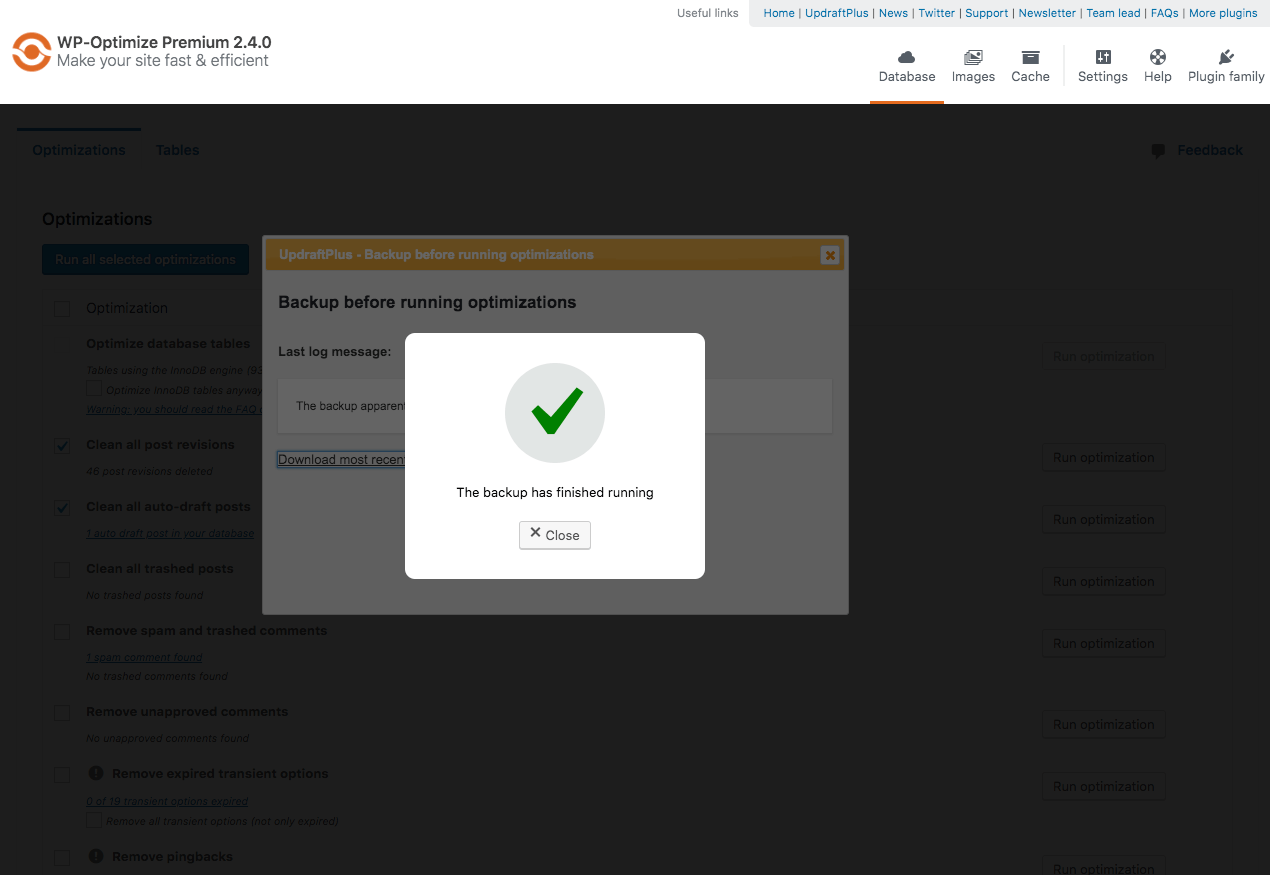
However, when performing more intensive data cleanup operations, you have to be more careful. If the database server crashes or shuts down during the optimization, your data will get corrupted. That’s why you need to back up your database before each optimization.
Fortunately, WP-Optimize allows you to back up the database with UpdraftPlus. You need to select the checkbox next to “take a backup with UpdraftPlus before doing this.” Once your database is backed up successfully, a pop-up message like the following will appear. Click “Close” and proceed further.
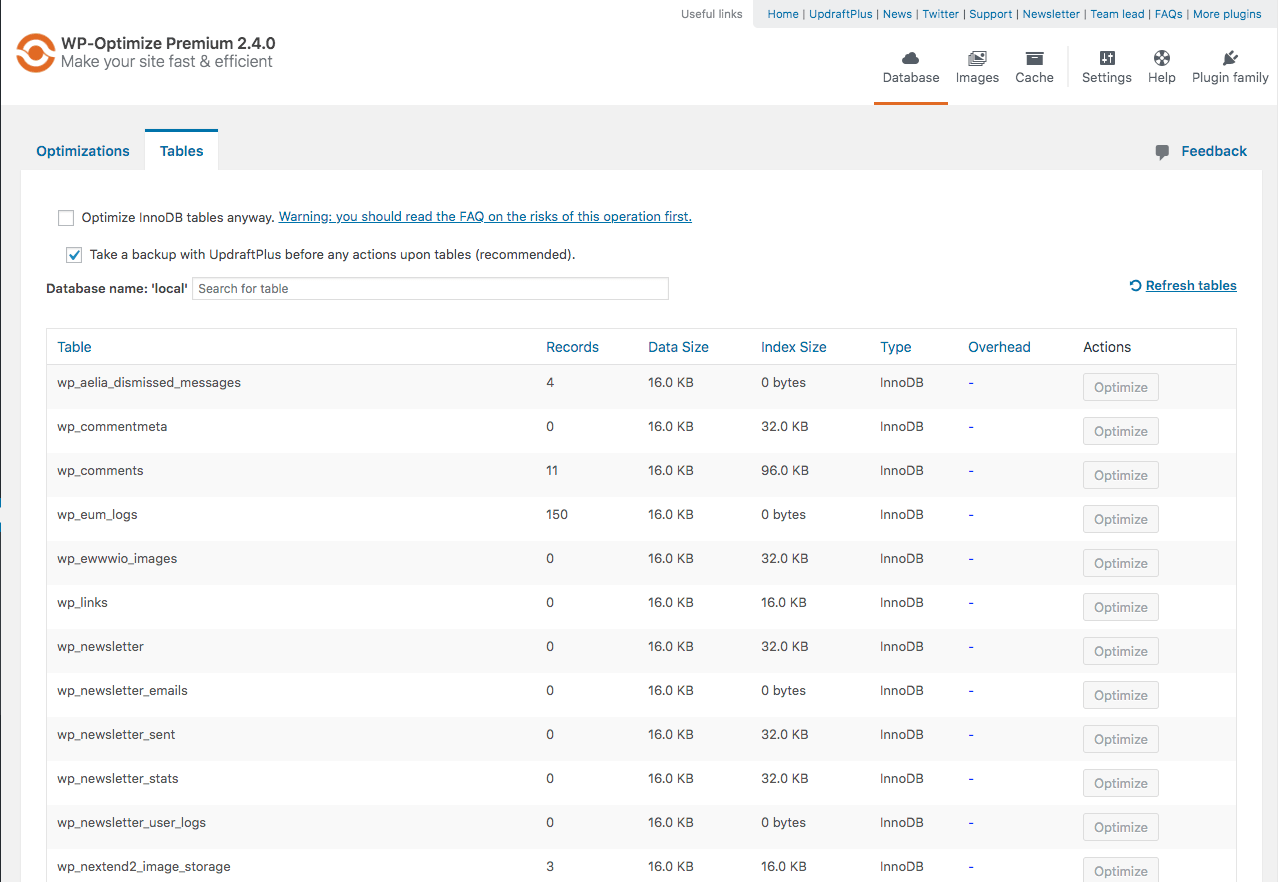
Click the “Run all selected optimizations” button to optimize. You can also optimize your WordPress database tables regularly using this plugin. Click on the Tables menu to see if you need to optimize the table or not. Click the Optimize button next to the desired table to optimize.
Parting Words
As you can see, loading speed and performance play a critical role in your WordPress site’s success. The lack of either one can cost you leads and conversions worth a lot of money, making it necessary to improve WordPress performance. Hopefully, these six tried-and-tested tips will help you boost your WordPress site’s performance quickly and easily. Good luck with optimizing your website.
About ReadWrite’s Editorial Process
The ReadWrite Editorial policy involves closely monitoring the gambling and blockchain industries for major developments, new product and brand launches, game releases and other newsworthy events. Editors assign relevant stories to in-house staff writers with expertise in each particular topic area. Before publication, articles go through a rigorous round of editing for accuracy, clarity, and to ensure adherence to ReadWrite's style guidelines.
Today in prediction market news, we're following the biggest developments shaping the industry, including today's congressional hearing on sports prediction markets, a Washington state court's preliminary injunction against Kalshi, and...