Note: This article was written in 2013. For more up-to-date Chromecast information—including some of its newest features—please refer to our latest Chromecast posts here.
The bad news for Chromecast hopefuls is that the $35 device has sold out nearly everywhere. But there’s also good news: Because people swooped in to snag the device so quickly, all sorts of useful workarounds are already making their way across the Web.
(See also: 10 Things You Need To Know About Google’s Chromecast)
For new owners and potential customers interested in what this cheap streaming dongle can do, here are a few Chromecast tips to get you started.
1. Play Your Computer’s Local Media
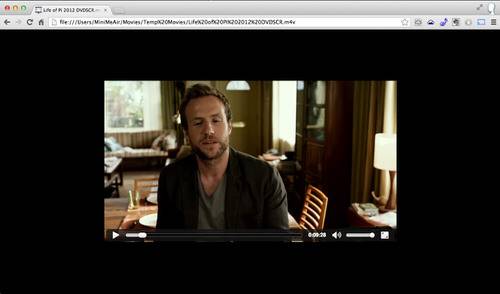
Access to local music and video files is obviously not Google’s primary intention—in fact, Web streaming from the likes of Netflix and YouTube was pretty much the belle of the ball at its press event last week. But the company didn’t make it impossible to access your home digital library, either. The secret to making it work lies with the tab casting feature.
Chrome on the desktop can open many file types. Just open a locally stored media file—whether amateur home footage, torrented files or other videos—within the browser, or drag and drop it onto the Chrome application. In general, if it plays in the tab, it should play just fine via Chromecast. Just tap on the “Cast” browser extension button to send it to the Chromecast.
What you need to know: The quality from a tab-casted video can appear fuzzy and/or pixelated, and you can experience other issues like hang-ups, skewed lip-syncing and lag, depending on the power of your originating device and the strength of your Wi-Fi network. Since audio files are generally much smaller than video, playing music wirelessly is more forgiving. And unfortunately, this only works in the desktop browser, as no mobile version of Chrome offers tab casting. Yet.
The takeaway: If a video file is available via Netflix, YouTube or Google Play, which directly support Chromecast’s cloud streaming, use those apps instead. Otherwise, you may want to intentionally lower the streaming quality (see below).
2. Watch Your Friends’ Shared Videos
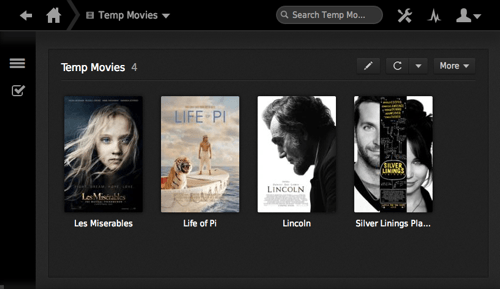
Tab casting can not only free your local media files, it can also dish up your friends’ music and videos too, if it can stream online (and doesn’t require a Silverlight or Quicktime plugin).
Let’s use the popular Plex service as an example. The free Web server, which streams media from home computers to mobiles and settop boxes, offers a sharing feature that can be pretty handy here. Plex users can actually grant other members full or limited access to their files on the Internet. Once again, since it plays in Chrome, it can also play via Chromecast.
Even better, in Plex’s case, the Web interface is attractive and easy to use, making this accidental feature feel almost intentional.
What you need to know: Since it relies on tab casting, it’s subject to the same video quality issues noted above.
The takeaway: It’s a quick and easy way to view other people’s shared media remotely. But don’t expect stunning HD quality. In addition to any limitations presented by your computer hardware and Wi-Fi connection, you’re at the mercy of your friend’s computer/server and network.
3. Screen Cast Your Entire Desktop

Not only can you cast your tabs, but you can send your entire screen to the TV as well, thanks to screen casting. Access this feature via the drop-down menu you get from clicking the “Cast” button in the Chrome browser.
This feature has a big “experimental” label slapped all over it, and it should—it’s buggy, laggy and crash-prone. However, even in this rough incarnation, it’s still a benefit for those odd occasions when you need to share your whole desktop with a room full of people. (Fingers crossed that it will only get better with time.)
What you need to know: There’s an important difference between tab casting and screen casting: Only the former can send audio. So if you play a video and screen cast it to your TV, the sound will still play through your computer’s speakers, but not your TV speakers. And the video quality can be even laggier than tab casting.
The takeaway: This feature seems most useful for looking at photo slideshows or displaying web pages. For now.
4. Tweak Settings For Smoother Playback
Streaming music may not require a screaming fast network, but videos are another story. The smoothness of videos streamed or “casted” from your computer can vary depending on the power of your terminal and the strength of your wireless router.
It also depends on how big your media files are. Higher quality videos come in larger files, and if all that data is moving like molasses through your wireless network, you may want to ease the traffic jam by adjusting your settings.
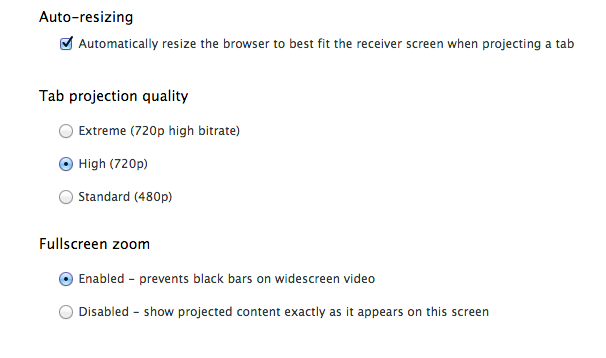
Click on your browser’s “Cast” button, choose “Options” and check out the “Tab projection quality” section. There, you can see selections for Standard (480p), High (720p) or Extreme (720p high bitrate). If High or Extreme is activated, and you experience insufferable lag or choppiness, try Standard instead.
What you need to know: This tip sacrifices a little quality for more seamless, less stuttery playback.
The takeaway: You can change your streaming quality, depending on the particular environment. So if you plan to bring the Chromecast to a friend’s house, where the Wifi is killer, just boost the quality back up.
5. Pipe Video And Audio Into Different Entertainment Systems
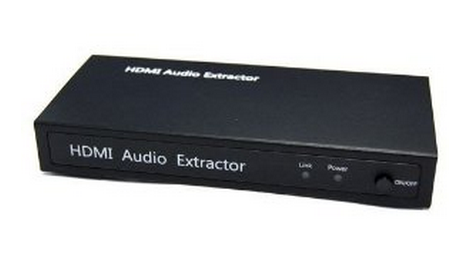
If you’re an audio fiend with a sound system that requires a direct connection from the source, then you might be dismayed with the Chromecast’s single HDMI plug for the TV. In that situation, a HDMI audio extractor could be just what the doctor ordered. The device acts as a splitter of sorts, breaking the HDMI into separate video and audio (S/PDIF) to feed two different sets of equipment.
Of course, a good AV receiver can do the job as well, but those can cost hundreds of dollars. Meanwhile, a HDMI audio extractor can be had for less than 50 bucks.
What you need to know: This may not work with all setups and with all types of TVs and audio equipment, particularly certain legacy systems. So check your specs carefully before picking one of these devices up.
The takeaway: Whether you add a HDMI audio extractor or AV receiver to your setup, you can certainly create a decent “Chromecastic” soundscape. But either way, the expense will add to the cost of a setup that was supposed to be cheap and easy.
Only The Beginning
These tricks are just the tip of the iceberg. TVs with the later version of HDMI (version 1.4) may be able to power the dongle autonomously without the USB cable or power adapter, and they may even wake upon Chromecast commands and switch input sources. This is plausible, considering the HDMI 1.4 spec is on Chromecast’s tech sheet, and Google even nodded to this capability in its press event (though the company didn’t offer specifics on it).
As time goes on, and more people use Chromecast, more tips, tricks, hacks and creative uses are sure to emerge. Have you stumbled on any that deserve a mention? Let us know if you’ve come across any hidden functions or cool features—intended or no—in the comments below.
Lead image by Madeleine Weiss for ReadWrite. Other images by Adriana Lee for ReadWrite.
UPDATE July 30, 2013: ReadWrite commenter and XDA Developer forum member umer936 found a hidden way to access additional setting options. He writes:
I found some extra settings on the Chromecast extension for Chrome.
So I went to my Chrome extensions window and clicked “Options” for the Google Cast extension. In the tab, I right clicked > Inspect Element.
I noticed that a section of the page had a “display: none;” so I removed that and got this:
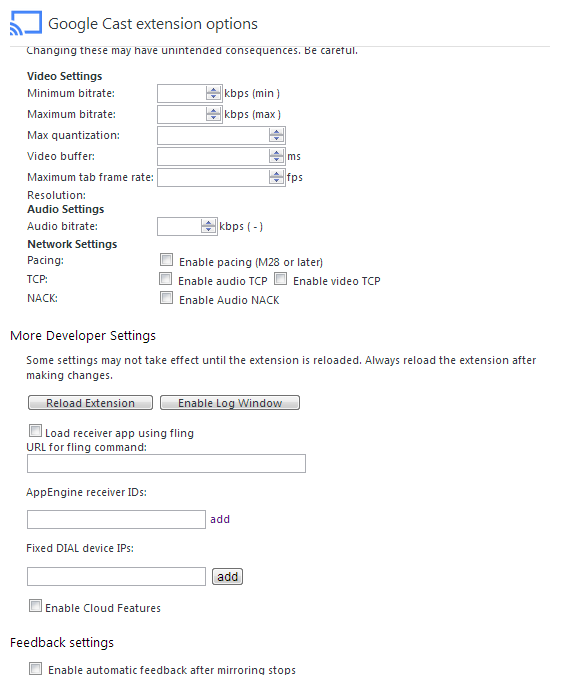
I can confirm that this works. The options pictured fall under a new section that suddenly shows up called “Custom mirroring settings.” Unless you know what you’re doing, I strongly suggest heeding the displayed warning: “Changing these may have unintended consequences. Be careful.”
Thanks for the tip, umer936!
UPDATE July 31, 2013: Just days after Chromecast launched, the device was already rooted. Not only that, but an audacious Redditor dubbed “braaains” seemingly figured out how to run a Gameboy emulator on it. We haven’t tried this ourselves, and we’re not recommending it, but if you’re curious about what it takes, you can read the rundown here.


