According to users Web-wide, iOS 7 seems to have made legacy Apple smartphones a bit dumber. Reportscontinue to pourin describing crashes, slowness and erratic behavior overtaking iPhone 4s and 4Ses that have upgraded to the newest version of iOS.
See also: Top 11 Mobile Trends Of 2013 and The Best Smartphones And Tablets Of 2013
Unfortunately for these users, there’s no going back. They can’t downgrade back to iOS 6—Apple saw to that—which means they’re effectively held hostage now. Sure, the captivity is of their own making, but if they ever want to see decent iPhone performance again, the fact remains that they’ll have to pay up for a new handset.
Perhaps it should come as no surprise; iOS 7 was designed with the more powerful iPhone 5S and 5C in mind. Yet many users are surprised, to say nothing of annoyed and frustrated. And, mostly, disappointed—especially the longtime users who believed Apple when it said they too could enjoy the strange, new technicolor world.
Ultimately, “enjoy” turned out to be an oversell. The older handsets buckle under the weight of the new software. And while there’s nothing users can do to make older iPhones with iOS 7 run like their newest counterparts, there are a few tweaks that can help ease the strain and crank up the performance a few notches.
Old iPhone, Meet New iOS—Now Take Cover
iOS 7 needs a powerful processor—the “brains” of the device responsible for carrying out what the software commands. Apple designed the operating system for its most powerful chip to date, the 64-bit A7, which includes both a CPU and an upgraded graphic processor. The OS simply won’t work on chips that predate the A4, the earlier and weaker chip powering the iPhone 4. (Some users, of course, complain that it barely works on the A4.)
It also doesn’t help that the iPhones 4 and 4S—the earliest devices eligible for this software update—have half the onboard memory, or RAM, of the newest iPhones. RAM holds recent data for easy access, so the more you have, the more data you can access quickly, and the faster the experience feels. The iPhone 5S and 5C boast 1GB RAM. The 4 and 4S each have a mere 512MB.

See also: The Three Most Annoying Things In iOS 7 And How To Fix Them
Apple’s attempt at extending iOS 7 compatibility to the 4 and 4S involved stripping down or eliminating incidental features, such as translucency effects and Maps Flyover. That’s understandable—and for some, it’s an acceptable compromise.
What’s not acceptable are problems such as crashing apps (even Apple’s own), hit-or-miss swiping for the control and notification centers, ragged home screen navigation, keyboard sluggishness, and really really slow app launching, closing and switching.
Since there’s nothing owners can do about insufficient hardware—short of buying a new device—the only alternative is to reduce the demands iOS 7 is placing on inadequate hardware. That means adjusting a few settings to eliminate any feature that isn’t absolutely necessary.
Giving The iPhone 4 And 4S A Boost
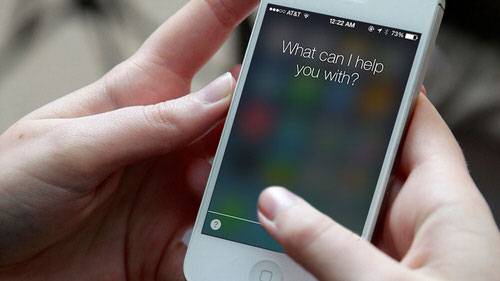
The operative phrase here: Less is more. For a noticeable difference in speed and stability, users should look to a few targeted areas—such as freeing up space on the device, limiting processes that attempt to work simultaneously and killing unnecessary features. Or at least, that’s what common sense seems to dictate. But do such tactics really make a difference?
I put that to the test by borrowing my friend’s iPhone 4 and my co-worker’s iPhone 4S and trying out a variety of different suggestions. The following tactics yielded the best and most consistent results.
UPDATE/WARNING: The tips below are not a step-by-step plan and are not intended to be followed in order. Instead, they’re broken out in sections, so readers can jump to the areas they’d like as they need them. If you intend to try all of the steps in one session, bear this in mind: It’s recommended that you start with the tasks with asterisks (**). These reset all settings. Do it in the opposite order, and you’ll wipe out many of the other changes that you have just made. Consider yourself warned.
**In Case Of Emergency: Do A Clean Reinstall
If your device is unusable and you’re desperate, you may want to erase the device and start again. But beware: Doing so will eliminate your settings, shortcuts and any changes you may have previously made, including those set out below in this article.
Similar to the way some people wipe and reinstall the operating system on their computers, doing a “clean install” could make a difference for your iPhone. The idea is that, by going back to a clean slate and adding things back one by one, you can eliminate any stray files, apps, settings and other random bits that could have accumulated over time.
Fortunately, I didn’t need to resort to this on either of the test devices that were so graciously loaned to me. But if you’re ready to scrap the whole thing and start from scratch, heed this warning: Back up your device first—either through iCloud or iTunes. If something goes wrong or you change your mind, at least your data’s not lost.
Next, open Settings, then General and tap Reset. Here, you can reset various aspects of your device, or erase all of your content and settings. Some users restore from their backup, but that could bring back some pesky settings or other issues along with it. For that reason, others reinstall apps manually by downloading from the App Store.
**Fix Keyboard Lag
Does your keyboard take a pregnant pause before gracing your screen with the intended character? Such lag can make texting and tweeting aggravating. Here’s a fix that should help speed up slow keys. But you’ll want to bear the following in mind before you continue.
Warning: If you had any keyboard shortcuts or other settings, saved passwords, etc. you will have to re-enter them after this step. If this is a small inconvenience worth getting a usable keyboard back, then proceed at will.
In Settings, go to iCloud and turn Documents & Data off and back on again. (Even better, leave it off if you don’t care about storing docs and data in your iCloud account.) Next, back out into the main Settings page, tap on General and enter the Reset settings. Select Reset All Settings.
Ditch Unused Apps, Unwieldy Files, Other Detritus
Reducing the amount of data stashed on your device can yield noticeable gains in performance. To see how much space you have left and which apps are hogging the most room, launch your Settings app, tap General, then Usage and check out the section near the top, under Storage. You’ll also see a list followed by your list of apps in order from largest to smallest. If you’re running low on space, go through the list and see if you can do without any of the larger apps. If so, uninstall them. Ultimately, you want to keep at least 15% of your storage space free, but ideally more.
Note: Sometimes, the app itself isn’t the offender, but its associated files. For instance, some e-magazines download as inexplicably files, so if you read lots of them, consider deleting old issues. Same goes for songs, videos, podcasts, photos, documents and other files.
Kill Automatic Background Processes
Automatic anything in the background is just a convenience feature. But it’s not very convenient when the extra processing burden keeps your iPhone from working well. The three biggest offenders:
- Background App Store updates: To stop automatic App Store updates and make them manual, just head into iTunes & App Store, scroll to Automatic Downloads and toggle off the Updates option.
- Background syncing: While you’re in Automatic Downloads (see above), you can also stop music, apps and books from auto-syncing across all of your Apple devices. Under Automatic Downloads, hit one or all of the toggles. (The more you switch off, the better.) Yes, you’ll have to manually sync them now, but it’s one fewer thing your poor phone will have to contend with.
- Background app processing: Apps constantly running in the background can slow your device to a crawl, and sometimes trigger force-quits without notice. To stop apps from running in the background, go into General, then Background App Refresh. You can shut it off for all apps, or decide on a case by case basis by going through the list.
Reject Parallax And Reduce Motion
Even if iOS 7’s moving graphics don’t make you queasy, your phone might not be so lucky. Those apps floating above the home screen are cool, sure, but is the effect worth the extra processing power? You can put an end to that in the General area. Select Accessibility and then Reduce Motion. Turn off the switch to “reduce the motion of the user interface, including the parallax effect of icons and alerts.”
UPDATE 10/22/2013: Apple just released iOS 7.0.3, and the software update includes one highly requested feature: the ability to kill zoom animations. So once you’ve updated your device, the Reduce Motion toggle will now eliminate two pesky features—the parallax effect and the unnecessary animations.
Turn Off The Blur/Transparency
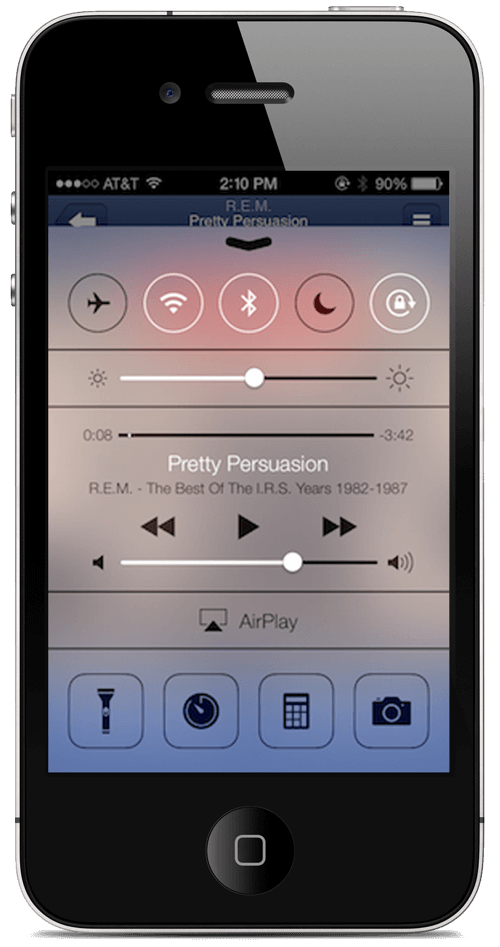
Still in Accessibility? Good. Before you leave, you’ll want to hit the setting that shuts off the cool, blurry background behind your notifications area and control center. Truth is, you’re not really getting the intended effect anyway. Your device is showing a stripped-down version that’s more like a dimmed transparency. Even so, it still uses the older iPhones’ limited graphics processor to display that.
Give your phone a break and shut off the visual effect. Look for Increase Contrast (in Accessibility, above Reduce Motion). Turn it on. Essentially what you’ll get is a flat background in a dark (notifications) or light (control center) hue. No blur or transparency necessary.
Reboot Your Phone
In the famous words of The IT Crowd‘s Roy (Chris O’Dowd), “Have you tried turning it off and on again?” iPhone users tend to keep their devices on for long stretches. In fact, most of the iPhone users I know never, ever manually turn their devices off. (And no, sleep mode doesn’t count.)

Advanced computer users know that restarting their desktops or laptops clears out temporary files and frees up memory, and the same may hold true for smartphones. That’s a compelling argument for iPhone users to power down periodically. Another is battery life. In fact, periodically letting an iPhone battery run down completely before recharging—which forces a shutdown—may actually be good for its longevity. Bonus.
Final Considerations
See also: Mysteries of Apple’s iOS 7 … Revealed!
The side benefit to many of these fixes is that they can also make a difference to battery life (though if the situation’s extreme, you may want to drill down on a few other settings).
There might be yet another reason to cut down the workload for older models: Some iPhone 4S owners report problems with the WiFi option “greying out,” rendering it unavailable. This is possibly due to the antenna or other WiFi hardware overheating as it tries to handle background processes, like syncing and downloading. My test devices didn’t have this problem, but some people report success—at least temporarily—by stashing the phone in the refrigerator or freezer for a few moments (presumably to cool anything that’s overheated).
Of course, if you explore iOS 7 bugs even further, the rabbit hole goes fairly deep, and not just for older handsets—from security issues that may block remote wiping to errors triggering “Blue Screens of Death.”
iMessage also seems to fail for many users of both old and new devices. Again, neither of the phones I used had this issue, in which texts fail to send (or go out late). But if it affects you, just know that Apple is expected to issue a software patch to fix it. Restarting the phone sometimes works, at least temporarily. Others have some success shutting off iMessage in Settings, erasing the network settings (under Settings, General and then Reset), and then re-enabling iMessage again.
While nothing can bring that older handset fully up to par with the latest model, hopefully these tips can help restore some of the performance you need, so you can continue relying on your once-trusty iPhone for a bit longer. That way, when you’re good and ready to make a switch, you can do so at your leisure—and not out of desperation.
Do you have other bugs to report with your older iPhone, or any fixes to share? Let us know in the comments below.
The IT Crowd image screen capped from YouTube video by johnnyricoMC
UPDATE: ReadWrite reader/commenter krewlworld shares this helpful hint: “Like many others, after upgrading my iPhone 4 to iOS 7, I was having performance problems – in particular, the unlock screen getting stuck mid-slide and jumpy scrolling.” His fix: Turning off Zoom (under the Accessibility setting), which he had previously enabled. You can find this in System -> General -> Accessibility -> Zoom.
“After doing this, the performance was noticeably smoother, no more stuck unlock screens and my iPhone 4 is now a delight to use again.” Thanks, krewlworld!
Do you have any other tips or fixes to share? Add them below in the comments.
UPDATE 1/28/14: Previously, the most extreme measures were listed last. As is often the case in troubleshooting, the simplest solutions are typically attempted first. But since the recommended reset wiped out the other changes suggested in the article, it was moved to the top, so that readers won’t undo the changes that they may have just performed based on the advice in the other steps.
