We’re sure by now you’ve heard about the upcoming extensions that will soon arrive in Google’s Chrome browser. Already we’ve seen a handful of these become available, including AdSweep, a PageRank checker, Cleeki, and, as of yesterday, a new bookmarking extension from Delicious. However, if you’ve been running the standard Chrome install (or even the public beta), new features like this are just out of reach.

If you’re a developer, you’re probably already running the version of Chrome released to the Dev channel, but many “regular folks” are hesitant to make this switch because moving from the stable release to the beta or from the beta to the dev release is a one-way conversion. You can’t go back to an earlier build without re-installing Chrome. So how’s another ordinary techie supposed to play around with all the cool new stuff coming to Chrome? The easiest way is to install a build of the Chromium browser side by side with your (stable) version of Google Chrome.
How to Install Chromium and Chrome on Your PC
First thing’s first, if you haven’t already installed a copy of Google Chrome on your PC, you should do so now. This new browser built on WebKit is winning converts right and left among the early adopter set these days, mainly for its blazing speed. From google.com/chrome you can grab the latest release or, if you’re a little more daring, you can click the link to download the public beta version instead.
That was the easy part – the trickier part is installing Chromium, the open-source project that powers Google Chrome. You may have already visited the Chromium site over on Google Code in search of the download only to be confused when no obvious download link jumped out at you. Home, Docs, FAQ, Blog, Group, Terms – but no “Download.” In fact, the only download link on the main page points you back to the stable version of Google Chrome. What gives?
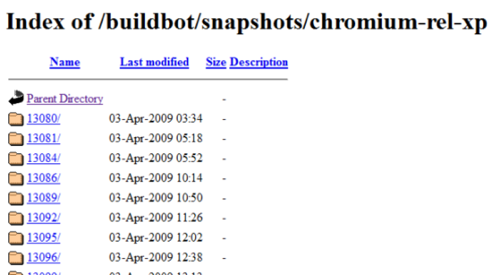
They’re probably not trying to hide the download from you; it’s just a matter of knowing where to look. Developers get this, but us “ordinary” tech enthusiasts may need a little assistance. You see, the Chromium builds are all stored online at build.chromium.org/buildbot/snapshots. If you’re a Mac or Linux user, this is where you can grab your copy, by the way.
Windows users need to head directly to the link at build.chromium.org/buildbot/snapshots/chromium-rel-xp. Once there, you’ll notice a list of build numbers accompanied by a “last modified” date.

To get the most recent one, scroll to the bottom of the page and click through to the files listed. The easiest way to install Chromium is to download the “mini_installer.exe” file. This is a simple executable that installs Chromium on your PC.
Make Chromium Extension-Ready
Once installed, there’s one more step before you can begin playing around with extensions in Chromium – you need to enable them. To do so, you’re either going to need to modify the Chromium shortcut or create your own new shortcut.
Windows XP
On a Windows XP computer, you can just modify the “Target” field in the file properties. To do so:
- Go to C:Documents and Settings[User Name]Local SettingsApplication DataChromiumApplication and locate the file called “chrome.exe.”
- Right-click on the file and choose “Properties.” Click the “Shortcut” tab.
- In the field labeled “Target” change the text to read (and yes, you need the quotes): “C:Documents and Settings[User Name]Local SettingsApplication DataChromiumApplicationchrome.exe” -enable-extensions
- Click “OK” when you’re done.
- Make sure this modified shortcut is the one you use to launch Chromium from now on. You may want to copy it to your desktop to be sure.
Windows Vista/Windows 7
On Windows Vista or Windows 7, you can’t simply modify the “Target”; you have to create a new shortcut instead. To do so:
- Go to C:Users[User Name]AppDataLocalChromiumApplication
- Right-click in the white space of that folder somewhere and click “New” on the menu that appears.
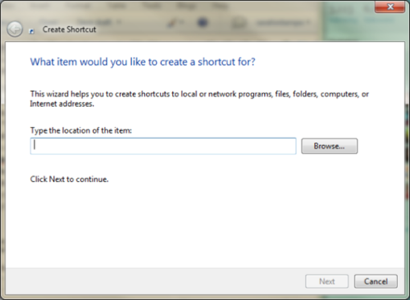
- Choose “Shortcut” from the menu to launch the Create Shortcut wizard.
- In the window that appears, enter in the following where it asks you for the location of the item: C:Users[User Name]AppDataLocalChromiumApplicationchrome.exe -enable-extensions
- Click “Next” then “Finish”
- A new shortcut will appear in the folder. Make sure this shortcut is the one you use to launch Chromium from now on. You may want to copy it to your desktop to be sure.

Launch Chromium and Install Extensions
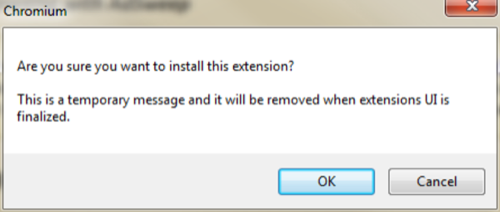
Now that you have Chromium installed and modified, you can play with extensions. To install an extension, you simply click on the hyperlink for the extension, which is usually labeled “extension_name.crx.” A box will pop up asking you to confirm; just click “OK.”

Here are some extensions you can try now:
- AdSweep: an add-on that hides advertising on web pages you visit, similar to how AdBlock works. It uses JavaScript to adjust the CSS of a page and is also available as a user script.
- PageRank checker: a simple extension that shows the Google PageRank for the current web site.
- Cleeki: an extension that delivers the functionality of IE8’s Accelerators to other browsers.
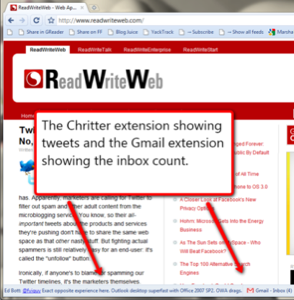
- Gmail Checker: One of the Chromium sample extensions that displays a toolstrip that shows how many messages are in your Gmail inbox.
- Subscribe in Google Reader: Another sample extension which adds a button to the URL bar when a page has a feed that can be subscribed to. Clicking the button takes you to Google Reader.
- BuildBot Monitor: A third sample extension which shows the current status of the Chromium Build Bot.
- Chritter: a Chrome Twitter notifier that shows recent tweets in the tooltip
- Delicious: the official alpha version of the social bookmarking extension. (Note: you may have to save the file on disk and then drag on to the Chrome window to trigger the install instead of just clicking on the link).

Final Note
Keep in mind that Chromium isn’t going to give you the same everyday experience of using the stable version of Chrome. While playing around with it, the browser actually crashed on me a couple of times – two times too many to make it worth switching over to permanently. This may just be an issue with the particular build I installed and will be corrected in a future version, but that’s what you get when you play with cutting-edge tech.
At least I was finally able to get my hands on the extensions and really see what they were all about. And for that, it was well worth the headaches. Extensions are incredible!


