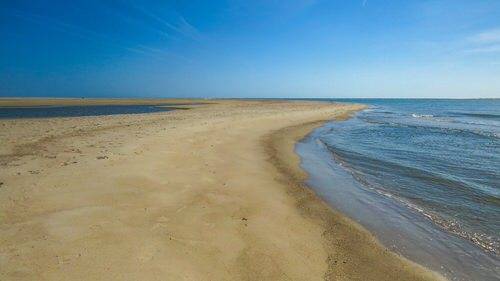
Like many others I depend onGoogle Maps for my travels. I also like to go places where even Google Maps are on unsteady ground. In fact some friends who have seen maps of my hikes have asked how I learned to walk on water.
You Don’t Have To Go That Far
You might think you need an exotic destination far into the wilderness to get beyond the capabilities of Google’s very capable maps. That is not always the case. I live six to seven hours south of Washington, DC, along North Carolina’s Southern Outer Banks near the town of Emerald Isle.
One trick to impressing your friends with a walk on the wild side is to find an area of beach that changes regularly. I learned this pretty much by accident.
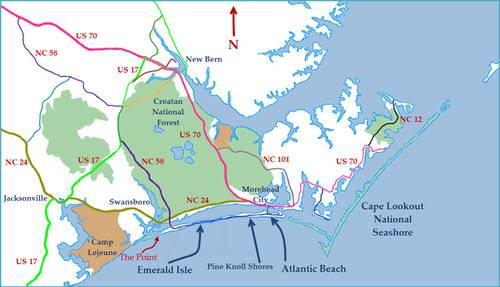
When we moved to the coast seven years ago, I had visions of driving my pickup truck on the beach. One popular place is called the Point – the western tip of Bogue Banks Island in the town of Emerald Isle. Just after I bought my beach driving permit in the fall of 2007, the beach at the Point disappeared – as you can see from this picture. Acres of sand were covered by water.
A couple of years later, the sand started coming back. Today there is more than 1,450 feet of sand to the edge of the water. Google Maps, using annual aerial photographs, simply can’t keep up.
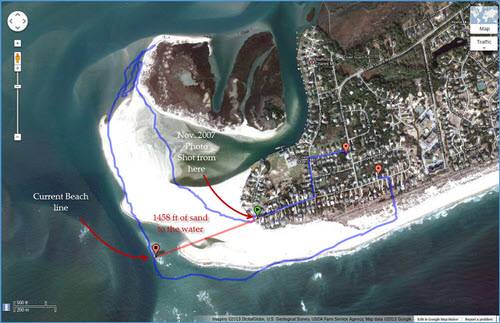
Above is a current Google map of two of my hikes. The red line was a hike we took in August of 2012. The blue line was a hike in May of 2013. As you can see, either I know how to walk on water or the map isn’t accurate.
Create Your Own Maps
Creating a map like this to impress with your friends is actually pretty simple.
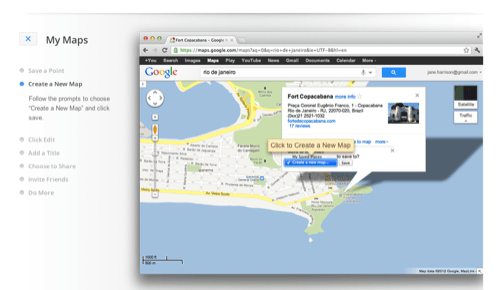
First you need to get access to Google’s My Maps. The next requirement is a smartphone that works with an app that can communicate with Google’s My Maps. (Go to Customize and Share in Google Maps, and scroll down to My Maps for instructions on how to do this.)
My Tracks Is A Great Tool
Google’s My Tracks is one of the main reasons I use an Android smartphone. All you have to do is launch My Tracks when you go on a hike. Stop the track recording when you finish your hike and “Send to Google.” My Tracks will create a new map (It can do some other cool things, too, but that’s a different post). To compare a second hike of the same area, just send both tracks to the same map.
You can even use My Tracks to create a map recording a series of hikes – I do this to creat my annual Emerald Isle beach survey. They’re are a great way to show people that you have gone beyond the regular Google maps.
Maps, Albums & Photos
The next step, if you are willing to spend a little more time and enjoy digital photography you can create an album with your photographs mapped into it. Here’s an album I created on a recent hike on the beach.
If your camera does GPS, all you have to do is upload the photos into something like Picasa Web Albums. I keep one of my Gmail accounts separate from my Google+ identity just so I can use the neat maps that show up in Picasa Web Albums.
If your camera isn’t GPS-enabled, adding GPS data is actually pretty simple:
- Synchronize the time on your smartphone and the time on your camera.
- If you are using the My Tracks app, after you have sent your track to Google, do a “Save to External Storage.” Choose “Save as GPX.”
- After it is saved, select the “Share track file” option and email it to yourself.
When I get back from the beach, I import all the photos into my computer and save the ones that I like to an album in Adobe’s Lightroom 4, which just happens to have a mapping module. Next I download the GPX track file that I emailed to myself. I select all the photos in the album, choose the Lightroom 4 command “Load Tracklog” and then “Auto-Tag” the photos. Almost instantly all your photos pick up GPS information. Then I export the photos to a folder, load them into Picasa and send them to the Web and share the album with my amazed friends.
While it may sound complicated, it is actually pretty easy. And it creates some wonderful memories of places beyond the reach of most map services.
