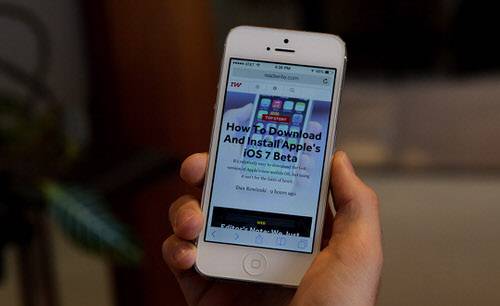
Update 9/24/2013: It appears Apple has blocked iOS 7 downgrades. The company has apparently stopped “signing” older versions of iOS—versions 6.1.3 and 6.1.4—which means they no longer have the permissions required for installation. For more, visit “Why You Can’t Downgrade iOS 7 Back to iOS 6” for the story.
Upgrading to iOS 7 is a pretty painless process. All that’s required is an Apple Developer account and the time it takes to download the install file. Going back, however, isn’t quite so easy.
Unlike instances in the past where upgrading to Apple’s new beta OS was a one-way road—which is the case again now that iOS 7 is released to the world at large—you can in fact still revert back to iOS 6 if you’ve upgraded to the iOS 7 beta.
See also: Why You Can’t Downgrade iOS 7 Back To iOS 6 and How To Download And Install Apple’s iOS 7 Beta
If you’re like me, you may have thrown caution to the winds by loading iOS 7 on your iPhone without much more than a vague hope that you could restore it to its prior (and fully functioning) glory. Fortunately, it’s a lot easier than various online guides are making it out to be.
Step 1: Download The Proper iOS 6 File
In order to install iOS 6, you must pick the proper version or iTunes will spit an error back at you. For the iPhone 5, you must download iOS 6.1.4. For everything else, it is iOS 6.1.3. If you use the wrong file for your device, iTunes will not allow you to restore it.
To review:
- For iPhone 5, download iOS 6.1.4. Depending on what cellular carrier you use, you will have to download a different version of iOS 6. Make sure you get the proper one for your network: GSM for AT&T and T-Mobile customers and CDMA for Verizon and Sprint. More info and a full list of worldwide carriers here.
- For iPhone 4/4S & iPod Touch 5: download iOS 6.1.3.
Step 2: Plug The Device Into Your Computer, Cancel The iTunes Automatic Sync Process (If It Starts)
When plugging in your smartphone back into your computer, the iPhone may begin syncing its data with iTunes. This could happen even if you had previously had it set to manual sync. This could be problematic if iTunes tries to make a new backup of your device with iOS 7.
You should cancel the sync just to be safe. While I did not let it happen with my device, having an iOS 7 backup could supersede your old backups and keep you from restoring your phone as it was in iOS 6 with all your content – apps, settings, music, photos – intact. Despite that, you should still be able to, at the very least, setup the device as a new iPhone.
Step 3: Do Not Put Your Device Into DFU Mode, Just Hit Restore
The popular notion when downgrading from iOS 7 to iOS 6 is to put you iPhone into DFU (Download Firmware Update) mode, which is Apple’s version of recovery mode for iDevices. It turns out that this is completely unnecessary and your iPhone can be downgraded without that extra effort.
To put your iPhone in DFU mode:
- Hold down the home and power button for 10 seconds.
- Release the power button while continuing to hold the home button for eight seconds.
This process sets up your phone automatically for a restore. It is not technically required to downgrade to iOS 6. At the same time, using DFU mode will not have any negative effect on restoring to iOS 6. You can use it if it makes you comfortable.
Once your iPhone is recognized by iTunes, simply hold the Alt/Option button on a Mac or the shift key on a Windows machine and click “Restore iPhone…” The option to choose the iOS6 .ipsw file will pop up, the same way it does when upgrading to iOS 7.

Find the proper file, click it and wait. If you don’t hit any annoying road blocks, your device should be back on the iOS 6 train. At this point, choose to restore it from a backup and pick your most recent iOS 6 backup. Hopefully, you made that backup the same day you took the iOS 7 plunge.
A Special Case: iTunes Error 3194
If you run into an error immediately following the process of the restore where iTunes says it’s verifying your iPhone’s eligibility, you might have simply downloaded the wrong iOS 6 file, noted above.
But if you’re absolutely sure you have the right file, then you may just be running into a common iTunes error. Cult of Mac detailed how to fix it.
Here’s the step-by-step breakdown:
- Navigate to the Finder, and select Go in the menu bar
- Click ‘Go to Folder…’
- Type ‘/etc’ and find the ‘hosts’ file
- Copy the ‘hosts’ file and paste it your desktop, then open it in Text Edit
- At the very bottom of the file, find a line that reads, “74.208.105.171 gs.apple.com” and delete it
- Drop that file back into the ‘/etc’ folder, choose replace (your Mac may ask you to authenticate the decision).
- Go back to iTunes restore using the methods described above
Let us know in the comments if you successfully downgraded from Apple’s newest beta. And don’t hesitate to let us know if you used a different method from the one described here to downgrade from iOS 7 to iOS 6.


