If you were a fan of the first Kingdom Come game, you would’ve likely slammed your money down on the table for a pre-order of Kingdom Come: Deliverance 2.
Doing so would’ve netted you a pre-order bonus of the exclusive The Lion’s Crest quest and an accompanying armor set.
However, this isn’t simply put on a plate for you at the start of the game so here, we’ll be taking a look at the The Lion’s Crest Bonus Quest so you can secure the Brunswick Armor.
Kingdom Come: Deliverance 2 The Lion’s Crest: How to complete
Contrary to being just given a bunch of items like other pre-order bonuses, you have to jump through a significant amount of hoops to secure the full Brunswick set from The Lion’s Crest quest.
You’ll be visiting a plethora of different locations on the map and taking on a wolf or two, so be prepared for some trekking.
After finishing up the prologue and arriving in Troskowitz, you’ll be able to start The Lion’s Crest right away.
Head to Scribe Gaibl west of the Troskowitz tavern who, upon talking to him, will give you a riddle to solve.
This riddle is basically the start of a wild goose chase, taking you to different areas to locate the various Brunswick Armor pieces.
You can find these in the land without following the riddle though and each of the items can be picked up in any order, so don’t worry too much about following it to a tee.
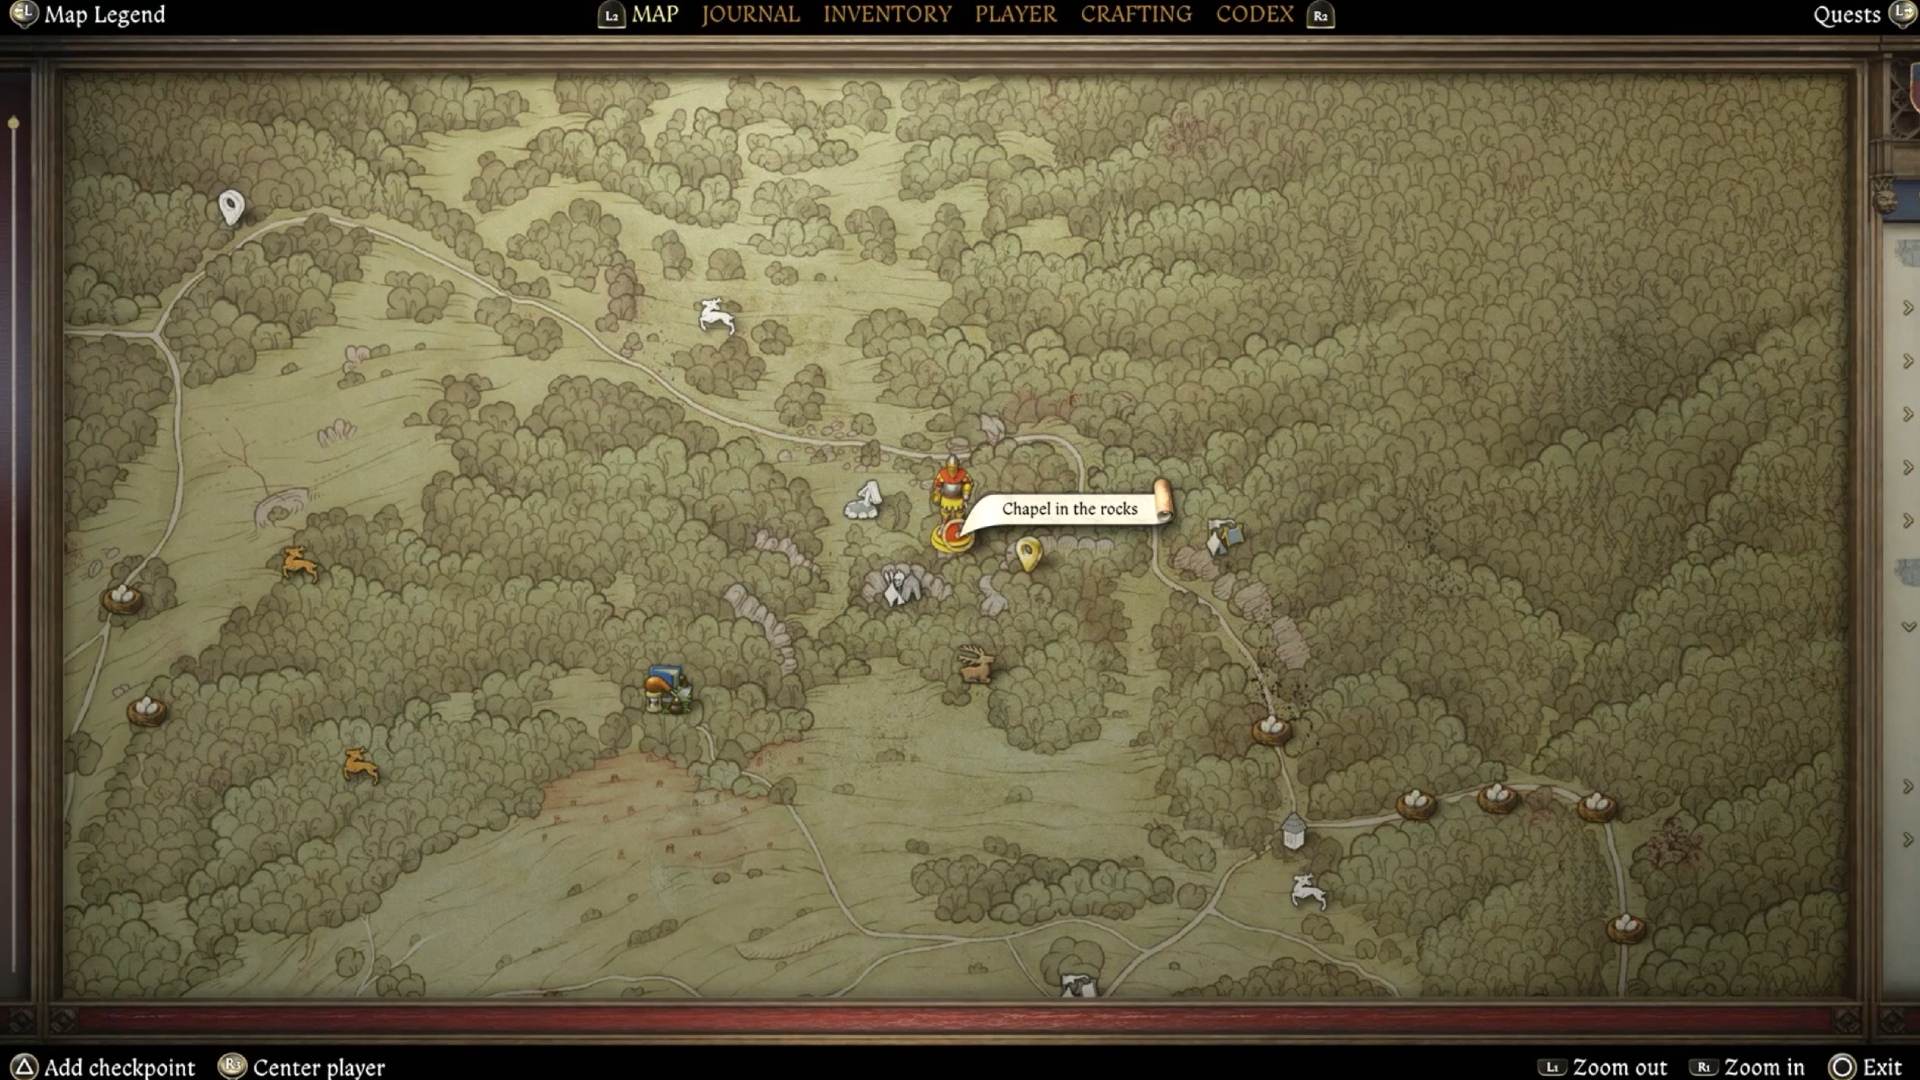
If you do want to head down the linear route, simply go to Chapel in the rocks, north of Trosky Castle, where you’ll secure the first two maps needed to find the loot.
Before you set out though, ensure you’ve got a weapon, a shovel, and some food in case you take a few hits.
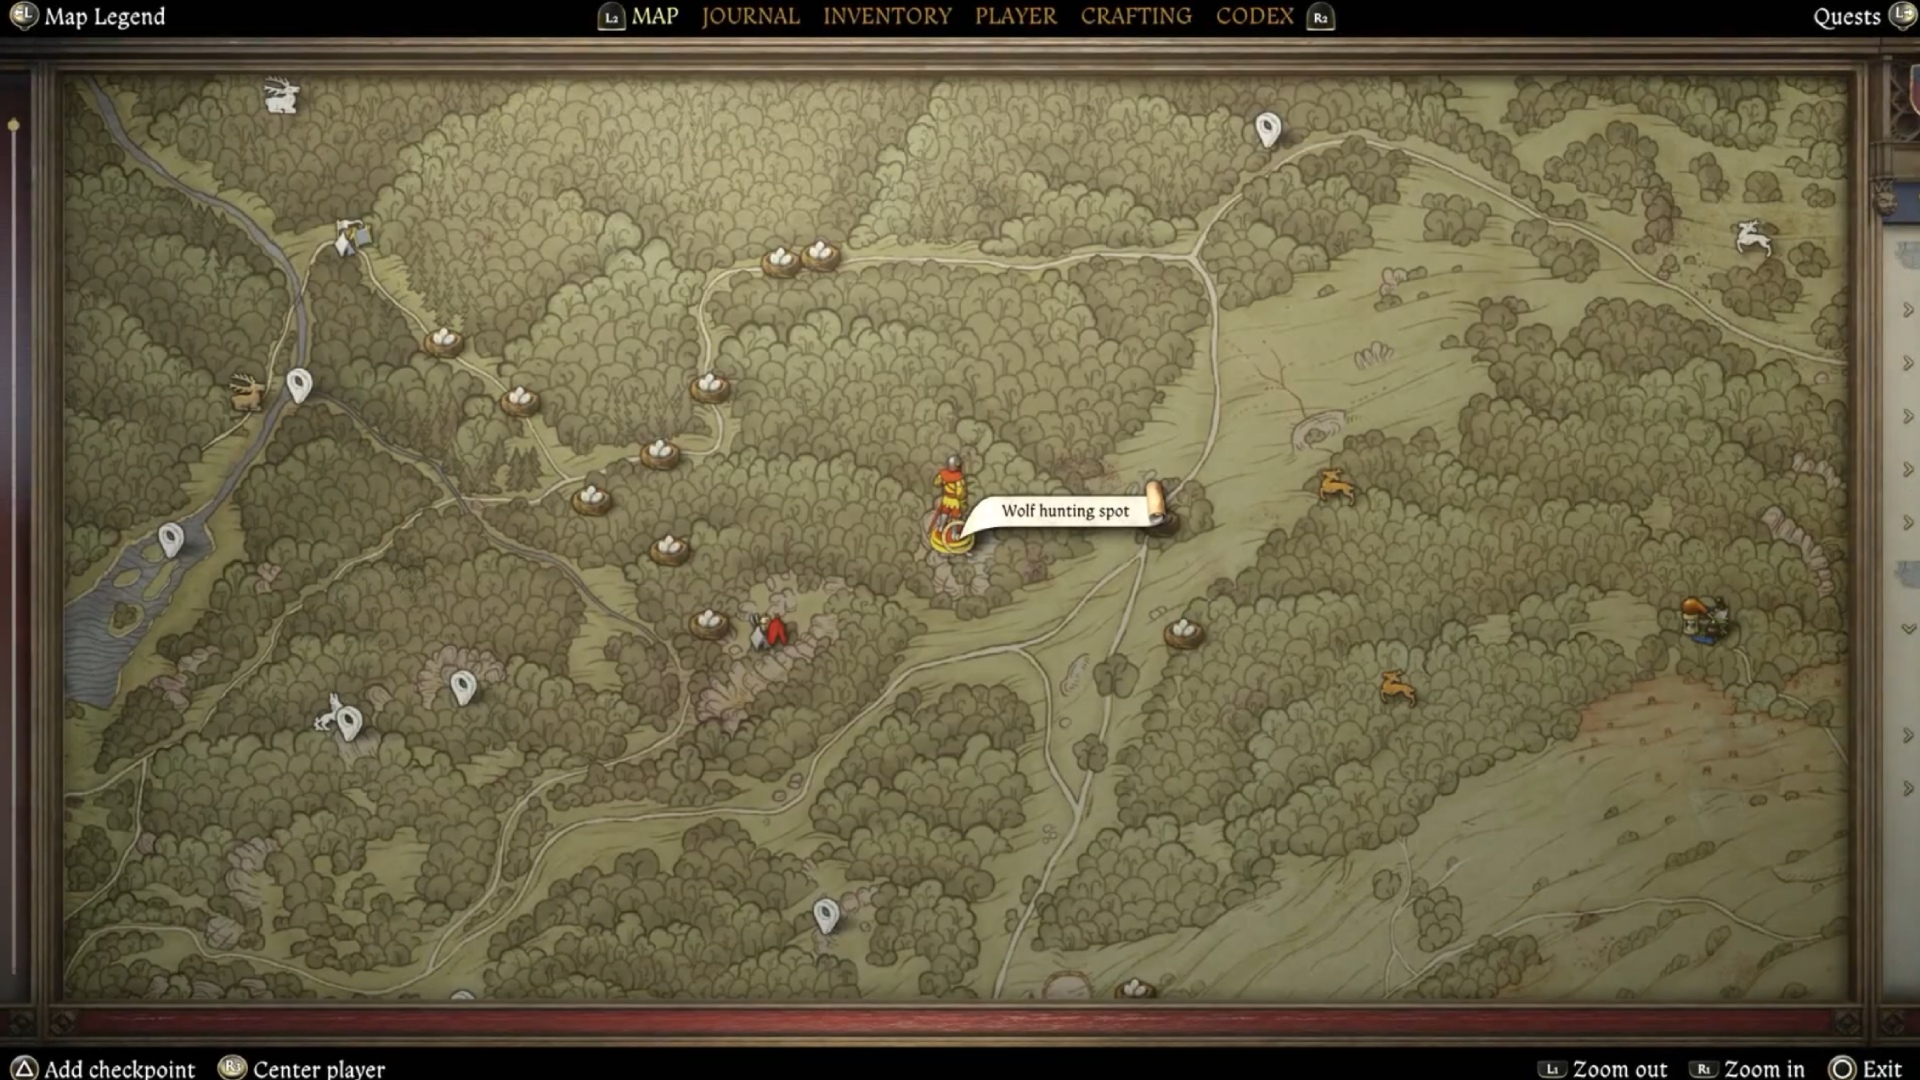
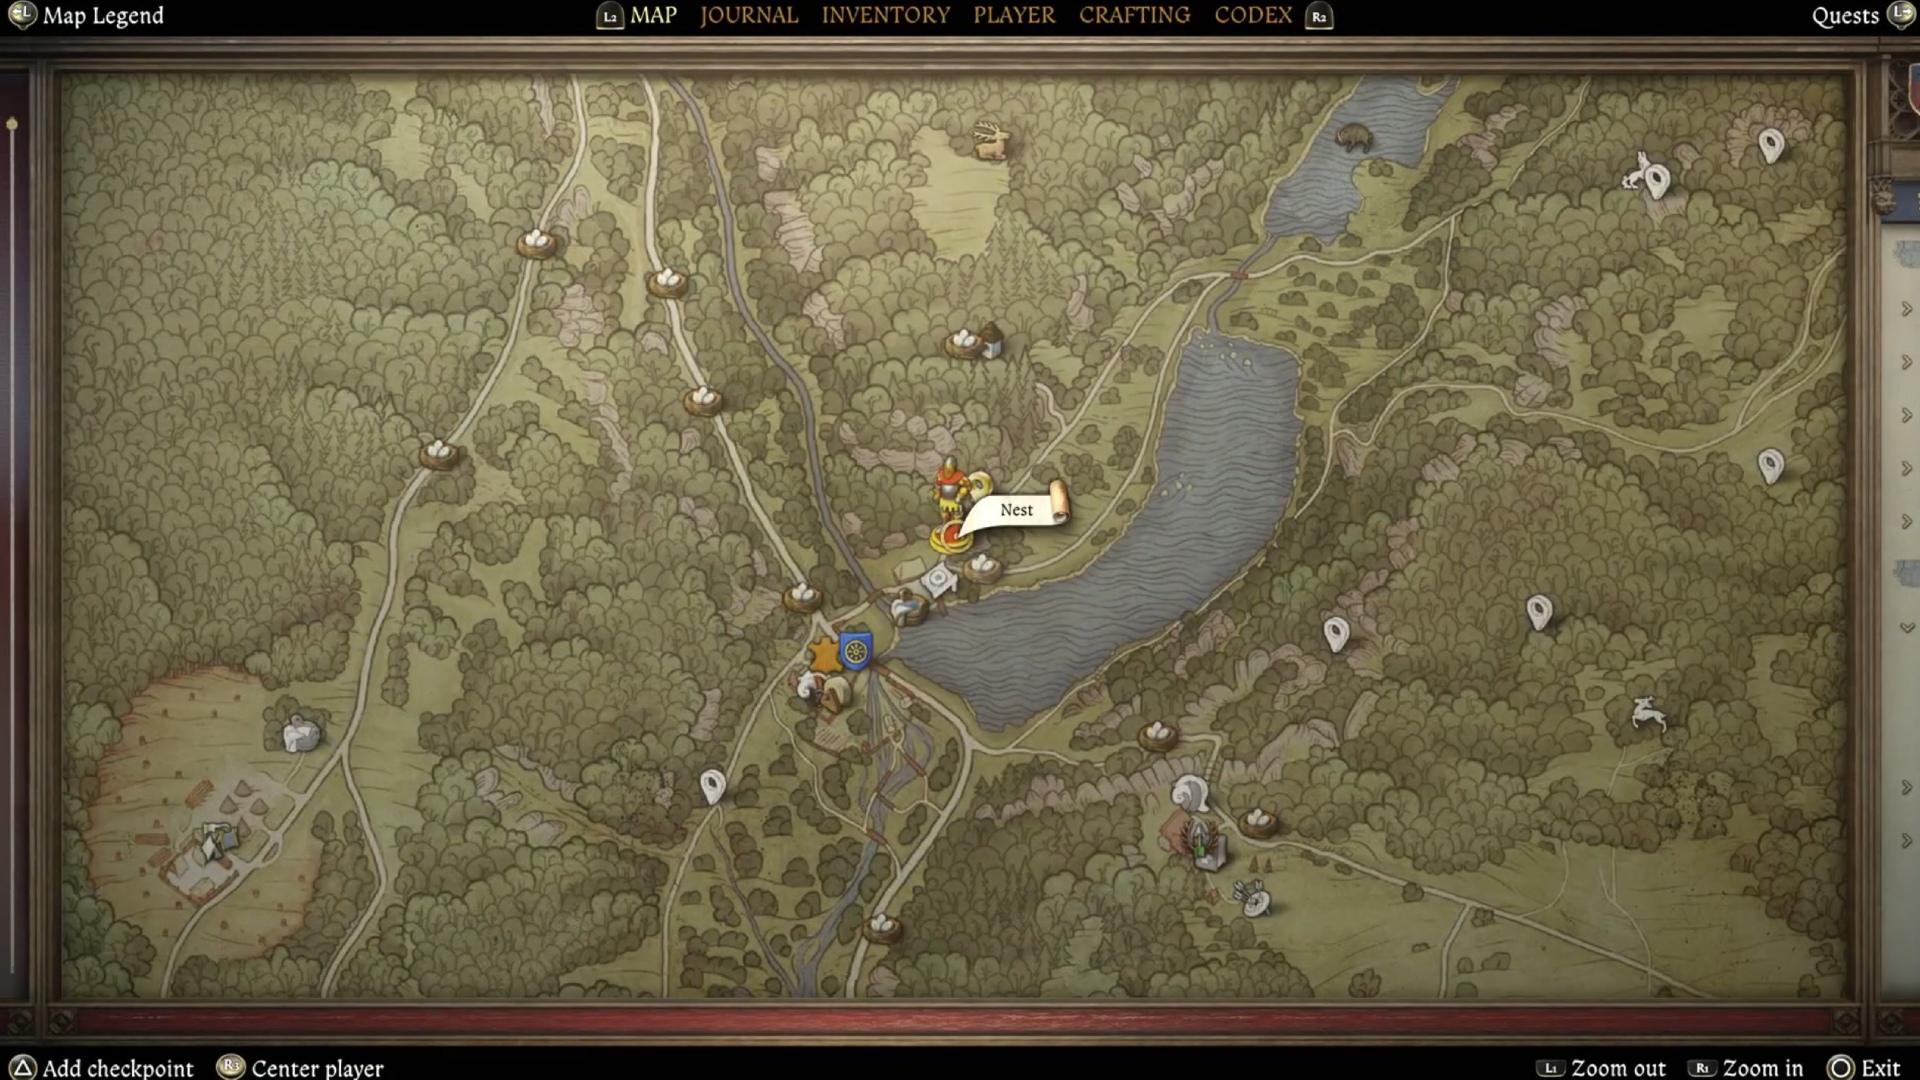
Brunswick Map 1 – Wolf Hunting Spot (Brunswick’s Caparison, Plate Leg Armor, and Chainmail Coif)
The first map leads you to the Wolf hunting spot, located west of the Chapel in the rocks and north of Tachov.
Before heading there, ensure you are accustomed to combat as you’ll have to face a pack of wolves.
Once the wolves are dealt with, look around for a cave in the rocky area where they were nesting.
Nearby, you’ll find two trees with a sack between them which you need to loot to secure three Brunswick armor pieces – Brunswick’s Caparison, Brunswick’s Plate Leg Armor, and Brunswick’s Chainmail Coif.
Additionally, inside the sack, you’ll find Brunswick’s Map III, which will guide you to the third location.
Brunswick Map 2 – Crosses in the rocks (Brunswick’s Plate Sleeves)
The second map takes you to Crosses in the rocks, which can be found along the western edge of Vidlak Pond, located southwest of the Wolf hunting spot.
To reach it, head to the southern end of Vidlak Pond village, then follow the path along the western shore.
Look for a large rock with a cross on top, which is accessible by climbing a sloped fallen tree trunk.
The controls are a little finicky here, so just take your time otherwise you’ll be receiving unnecessary damage.
At the base of this rock formation, you’ll discover a chest beneath the cross. Opening it rewards you with Brunswick’s Plate Sleeves.
Inside the chest, you’ll also be given Brunswick’s Map 4, leading you closer to completing the full armor set.
Brunswick Map 3 – Cross and skeleton (Brunswick’s Brigandine)
The third map directs you to the Cross and skeleton location, which lies in the forest north of the Zhelejov Wagoners’ Inn, southeast of Vidlak Pond.
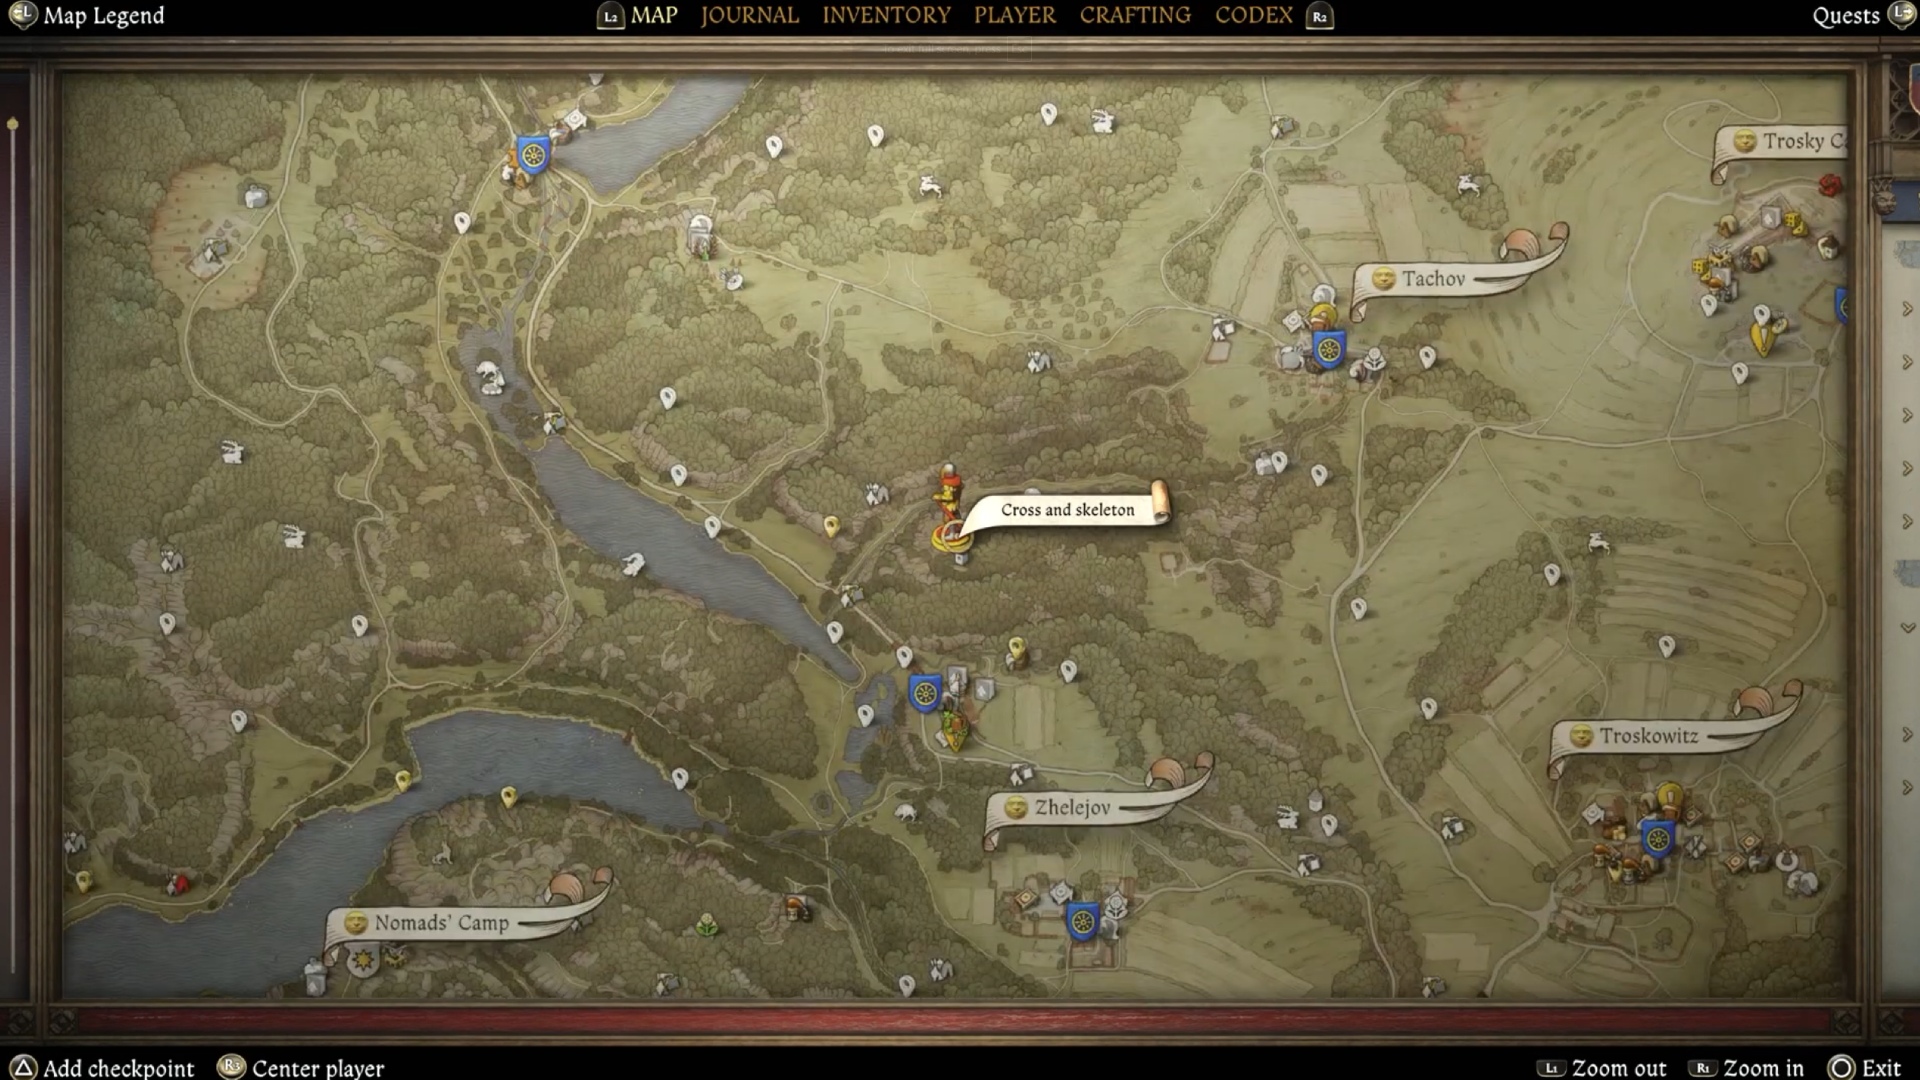
To get there, cross the bridge out of town, then take a right onto the forest trail past the camp by the road.
As you continue along the path, take another right up a smaller trail into the rocky cliffs.
You’ll eventually see a cross on top of a rock and further back, a skeleton is lying against a tree with another cross nearby. Loot the skeleton’s sack to obtain Brunswick’s Brigandine.
With this, you’re only one step away from completing The Lion’s Crest and obtaining the full set of Brunswick’s Armor.
Brunswick Map 4 – Treasure hunter’s camp (Brunswick’s Bascinet)
The final map points to the Treasure hunter’s camp, found atop a hill east of the Nomads’ Camp and west of Bozhena’s Shack.
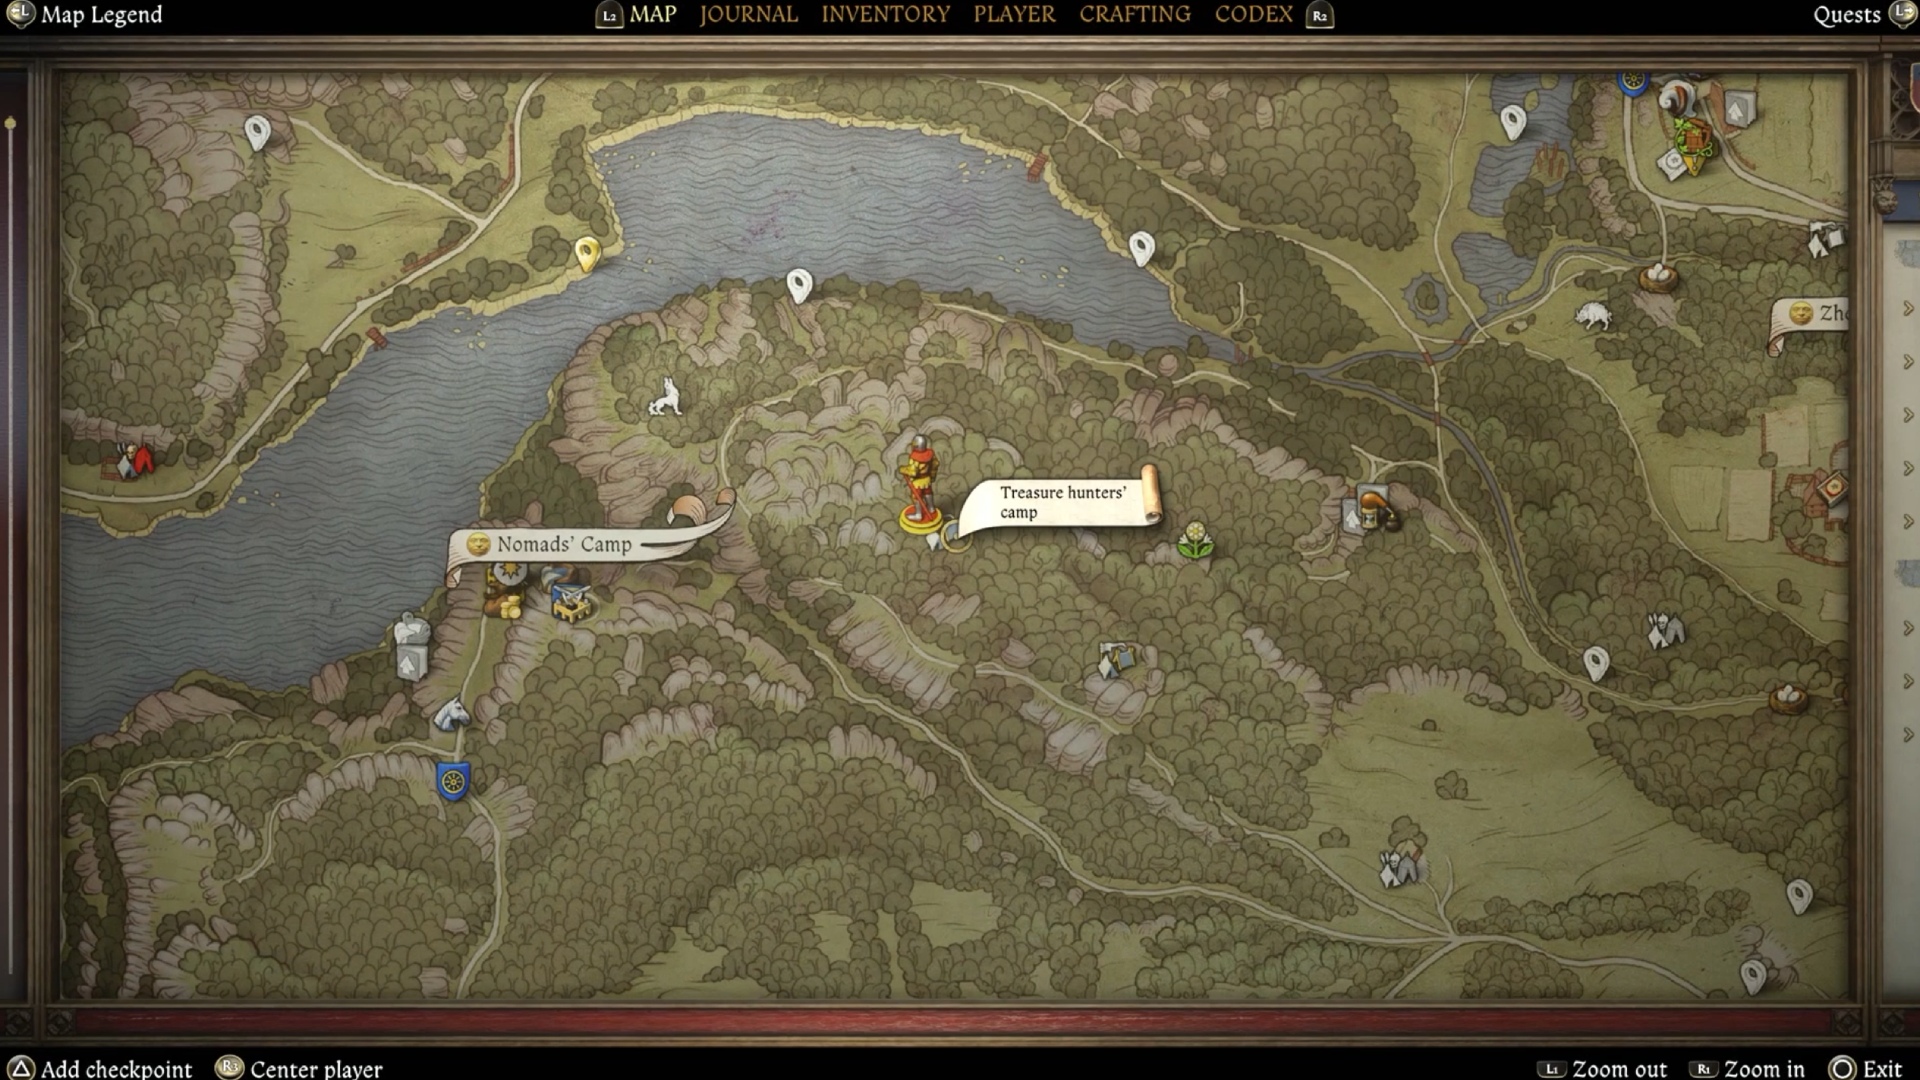
Compared to the previous locations, this one is easier to find, but it presents a different challenge as there are bandits patrolling the area.
You can go out sword in hand if you’re confident in battle but if not, you’re best off using a more stealthy approach, potentially at night, and you can dispatch them with a little less actual fighting.
Once the area is safe, look for a stone cairn with a cross on top, which contains the final piece of the armor set — Brunswick’s Bascinet.