An important feature of the Raspberry Pi is the row of GPIO pins, where GPIO stands for general purpose input/output. It will allow us to communicate between Pi and the outside world. We have 40pins on Pi, we count these pins from left to right out of which seventeen pins are GPIO pins. Different pins are used for the different functions and can be connected to a number of external peripherals such as buttons, lights, relays, sensors, etc.
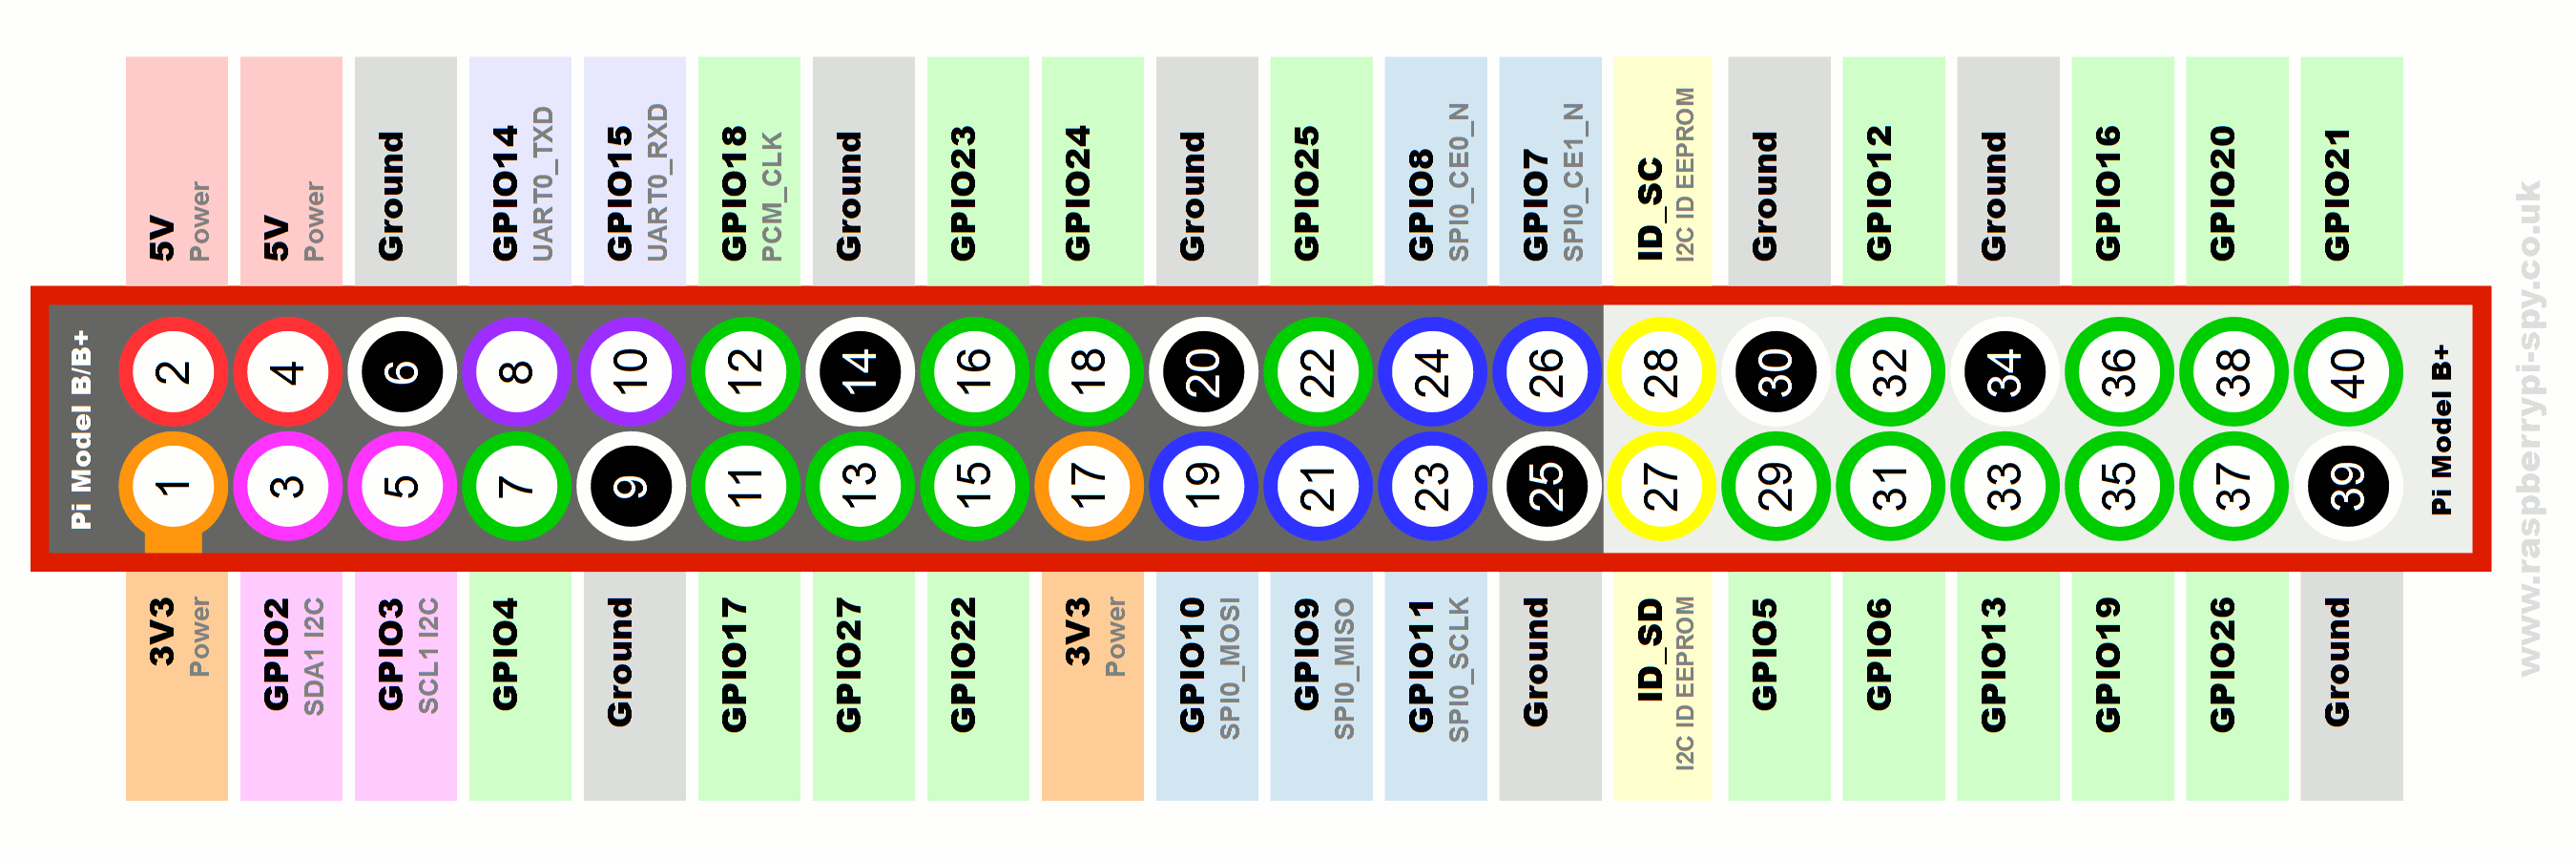
- GPIO – are the standard pins that are used to turn on/off the device.
- Power source – There are different voltage level i.e 3.3V, 5V.
- GND – These are the pins used to ground the devices.
- I2C – Inter-integrated circuit pins allow us to connect and communicate to hardware modules which support the I2C protocol.
- SPI – Serial peripheral interface bus, these pins can be used to connect and communicate to SPI devices, it also makes use of a different protocol.
- UART – Universal asynchronous receiver/transmitter are the serial pins used to communicate with other devices.
In this tutorial, we are going to learn how to use GPIO pins to blink an led followed by controlling it with a push button.
Blinking a LED with the Raspberry Pi
Prerequisites
- Raspberry Pi.
- LED.
- Breadboard.
- Resistor(270ohm).
- Jumper wires.
Hardware Setup
The easiest and quickest way to get an LED to blink is by looking at the pins of the GPIO and decide which one to use. The anode of the LED is connected to GPIO4(Physical pin 7) through a 270ohm (above 100ohm would be fine, higher the resistance dimmer is your led) resistor. Connect the cathode of the LED to GND.
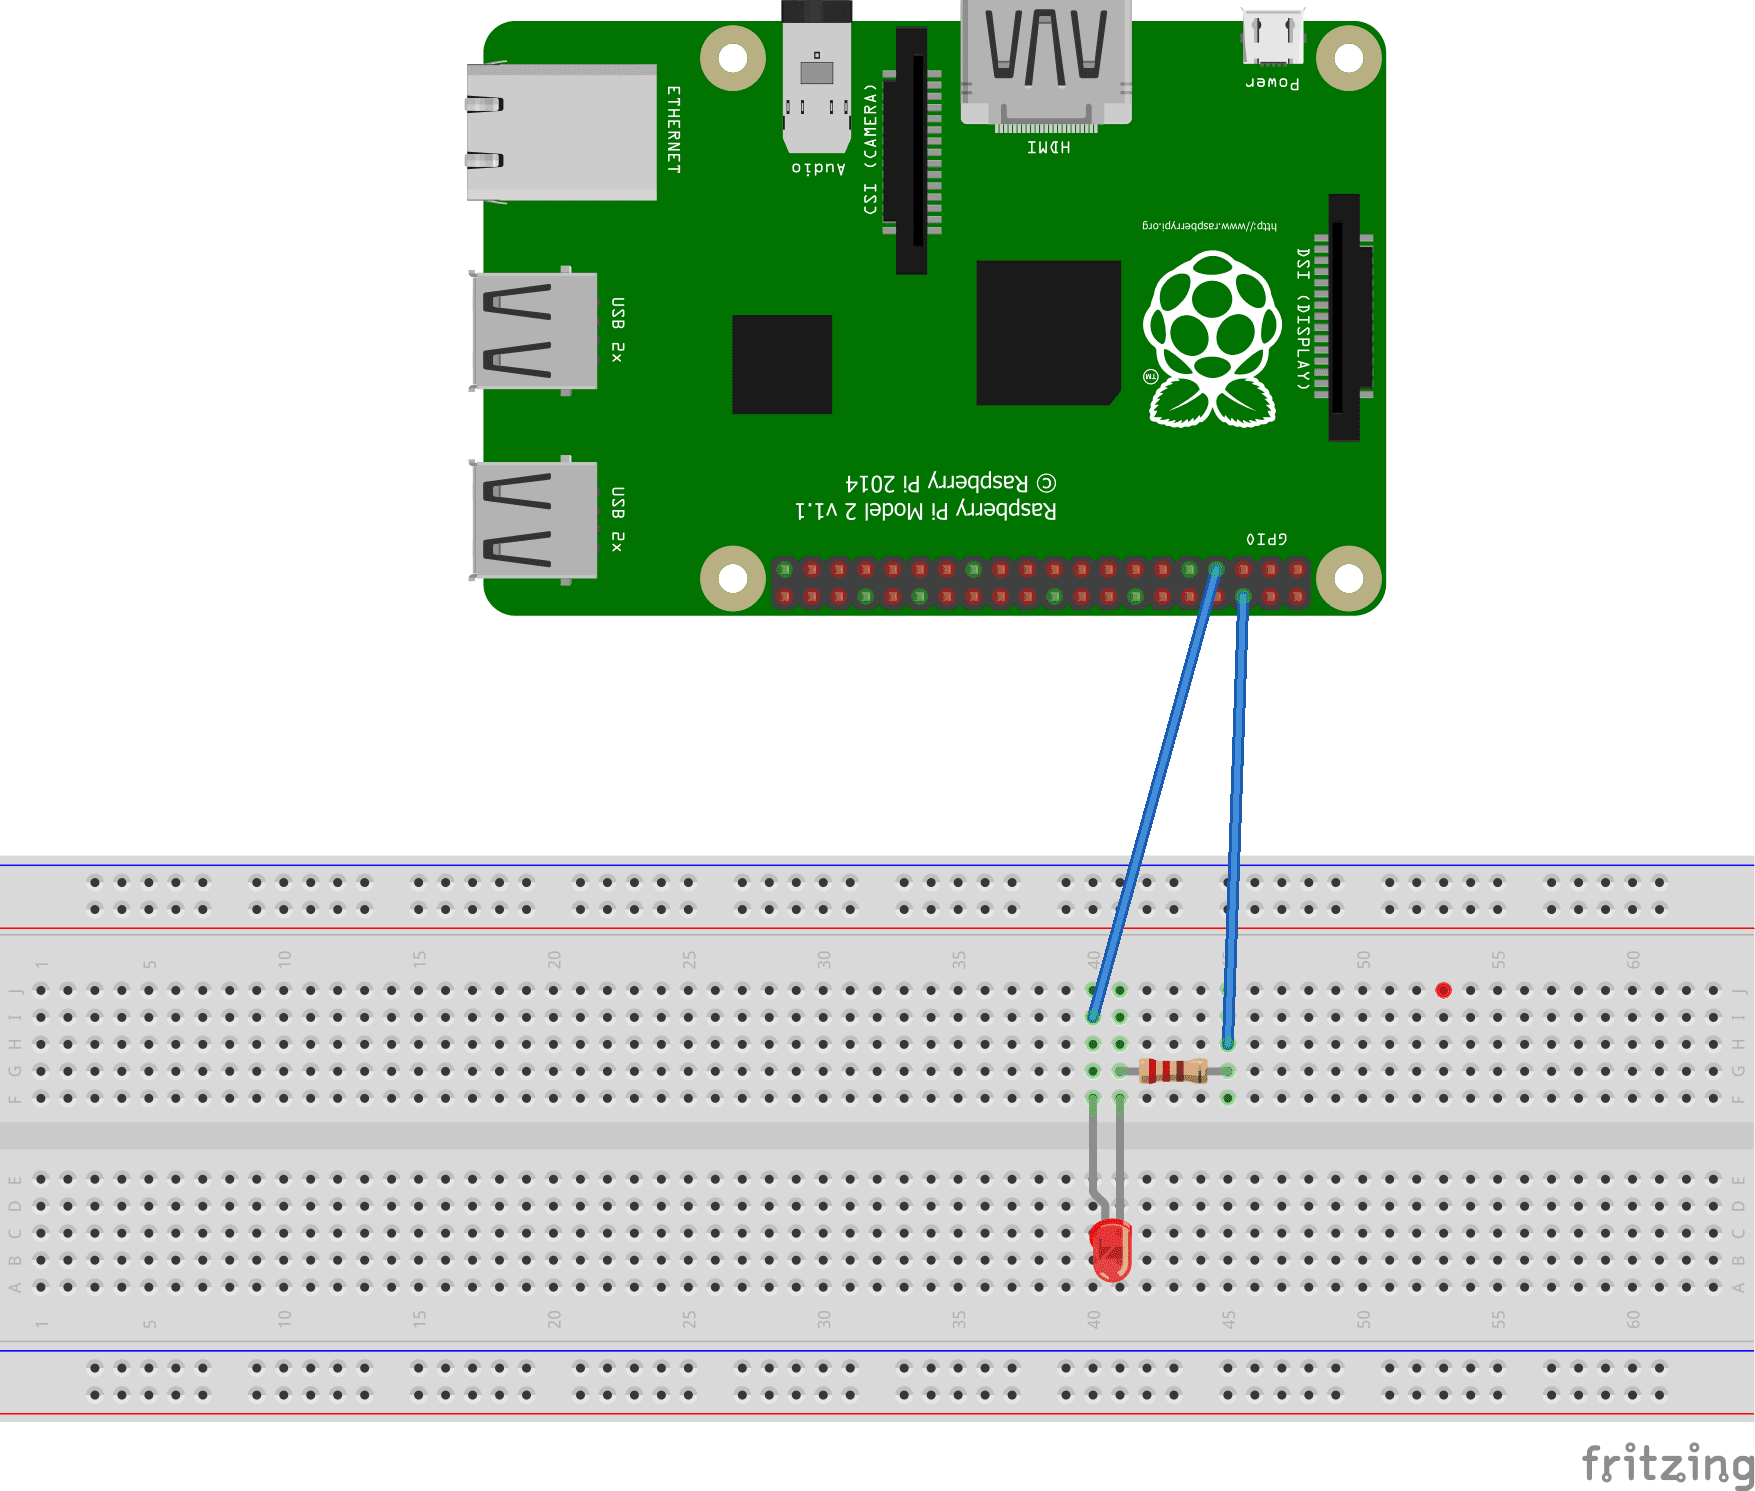
The GPIO Pins will act as a source and when it is activated it provides with 3.3V.
Code
Here, we are making use of the Python programming language and the Raspberry Pi GPIO Library to create a script to blink an led. From the Raspberry Pi desktop, click on the Start Menu (on the extreme left side of the taskbar). Go to Programming and Open up Python3 (IDLE). Then copy the code below:
import RPi.GPIO as GPIO              #Import GPIO library.
import time                             #Import 'time' library.
GPIO.setmode(GPIO.BCM)          #Use board pin numbering.
GPIO.setup(4,GPIO.OUT)            #Setup GPIO Pin 4 to OUT.
while True:
    GPIO.output(4,True)                   #Turn on GPIO pin 4.
    time.sleep(1)                             #Wait for one second.
    GPIO.output(4,False)                 #Turn off GPIO pin 4.
    time.sleep(1)                            #Wait for one second.
Run the code by hitting F5 key. The LED will start blinking now. If you want to alter the rate of blinking of the LED, just increase the delay time inside time.sleep().
In the next case, we are learning how to Start and Stop a LED from glowing with the push of a button.
Prerequisites
- Raspberry Pi.
- LED.
- Pushbutton
- Breadboard.
- Resistor(270ohm).
- Jumper wires.
Hardware Setup
One end of the pushbutton is connected to the GPIO23(physical pin 16), while another end is connected to the ground. The anode of the LED is connected to GPIO24 (physical pin 18), while the cathode is connected to the ground through 270-ohm resistor.

Code
import RPi.GPIO as GPIO
import time
from time import sleep
GPIO.setmode(GPIO.BCM)
blinkcount = 3
count = 0
LEDPin = 24
buttonPin = 23
GPIO.setup(LEDPin, GPIO.OUT)
GPIO.setup(buttonPin, GPIO.IN, pull_up_down=GPIO.PUD_UP)
buttonPress = True
ledState = False
try:
    while count < blinkcount:
        print("press the button")
        buttonPress = GPIO.input(buttonPin)
        if buttonPress == False and ledState == False:
            GPIO.output(LEDPin, True)
            ledState = True
            print("LED ON")
            sleep(3)
        elif buttonPress == False and ledState == True:
            GPIO.output(LEDPin, False)
            print("LED OFF")
            ledState = False
            count += 1
            sleep(1)
finally:
		GPIO.output(LEDPin, False)
		GPIO.cleanup()
Now, run the code and you can toggle the state of the LED by pressing the Pushbutton.
Now, that you know the basics of getting started with the Raspberry Pi GPIO, tinker around with more pins by connecting more LEDs and buttons, play around with the time delay settings and of course have fun while doing it.
Do let us know in the comments if you found this post helpful and if you need any help to replicate the process. Stay tuned for more Raspberry Pi tutorials, as we will be bringing more interesting projects with IoT, AI, etc.