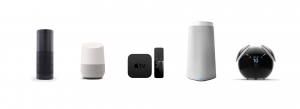
The number of connected devices increases day by day, and ubiquitous IoT adoption provides more opportunities for hardware development. Of course, to outperform the Big Four (Amazon, Google, Samsung, Apple) and find your niche poses a significant challenge. Additionally, if you find a new use case for a next-level consumer gadget, you’d better prepare yourself for a long transformation of your idea into a viable product
My aim is to help break the hardware development process into several phases and make sure each stage has been passed through. To illustrate, I will use the examples of a smart speaker and other gadgets our design-house [notanotherone.com] has worked on.
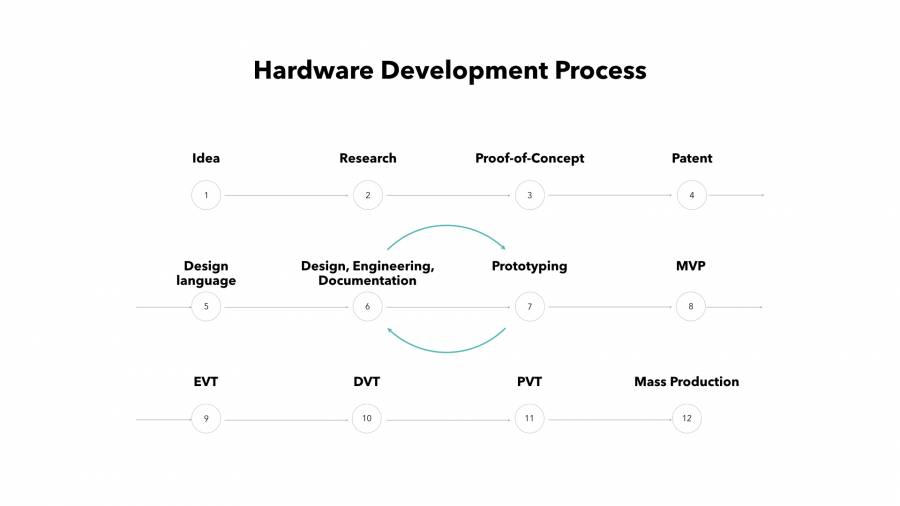
A smart speaker or a smart screen usually goes through these hardware development stages
1. Feasibility Study for Hardware Product Development
Hardware is a capital intensive industry. No matter how great your hardware startup idea is, you need to prove that it’s viable. Firstly, you need to check if the concept is technically feasible and has good potential market demand
After you define the product’s core functionality and side features, compose a list of technical specifications. Checking local and international regulations in the early stages helps to avoid poor planning. For example, I heard of a case when an AI-powered app for kids encountered a 1-year production delay because they had to develop a solution from scratch to meet the requirements of the Children’s Online Privacy Protection Act
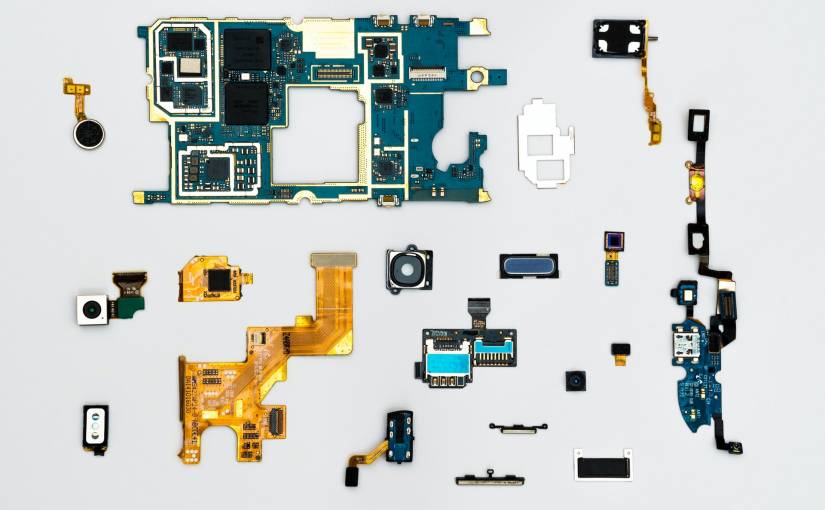
To assess the technical feasibility, the developers usually start with an evaluation of competing solutions. You can buy several popular products and disassemble them by yourself or check some of their teardowns online. Taking the time to tear-down and understand technical research should result in a datasheet of the main components and suppliers. Moreover, this is how you can evaluate popular devices by COGS (cost of goods sold). COGS is basically all costs spent on placing the device on the shelf: manufacturing, shipping, import/export tax, etc
Building Your MVPr
MVPr (minimum viable prototype) is your very first implementation of the product idea. The developers may spend several days to create the first prototype with basic functionality. It aims to confirm that the idea is valid and provide some certainty about its experience. Unlike MVP (minimum viable product) which should gather other users’ insights, it’s made mostly for internal assessment
To create the MVPr for smart speakers, you can use commercially available modules or HDKs (hardware developer kits). Nowadays, tech giants like Google, Amazon, and Qualcomm and small companies provide HDKs. The HDKs ease the development process a lot. Developers gain access to the SDK (software development kit), test firmware, and sample applications in a bundle with the HDK
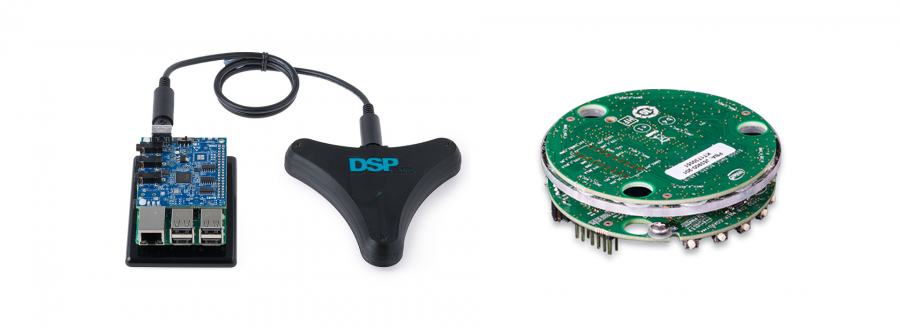
When you choose an HDK, you should consider:
- Target OS
- The target voice assistant that you plan to use: Amazon, Tmall Genie, Turing, JD, iFLYTEK, etc.
- Planned specification of the device: processor frequency, architecture, number of microphones, etc.
HDKs contain different numbers of microphones and are available in different price categories.
Marketing study
If the startup has drawn a multi-million dollar investment for its disruptive connected device, the product-market fit might not be there. Marketing managers pour lots of money into promoting the product. As a result, distribution channels notify you about sales growth. Meanwhile, once you slow down your activities, sales just stop, because customers don’t comprehend the value of your product
Market research helps you see the product idea from the user’s perspective.
- You should understand who your customers are, their social characteristics. During product development, the developers refer to these user personas while prototyping the design and UX
- The main question is what value does the product provide? Which problem does it solve and how serious is this problem for your customer?
- What are the unique features of the product? Which characteristics are crucial for the customer?
Competitive analysis is also important.
SWOT analysis and Porter’s Five Forces model can serve as a starting point for more in-depth research. Besides strategic parameters such as brand positioning, pricing policy, market share, one should check the technical specifications of the top competitor products. By the way, it’s convenient to create a timetable with colored schemes to highlight the trends in hardware functionality
But, what happens to those ideas when they are turned into products?
2. Patents in Hardware Development
Hardware startups should take care of design patents and utility patents as a top priority.
Authenticity and aesthetics are valuable assets of every consumer device. Design patents aim to legally protect the unique visual features of the product. In contrast, utility patents guard the novelty of your engineering
Patents are pricey and may cost up to $20 000. If you can’t file a full patent application, a “Provisional patent” might be your best bet. This application allows you to retain authorship for one year before filing a full application. It usually costs around $200-500
An applicant can conduct preliminary patent research independently via USPTO (USA) or the European Patent Office. Checking these two sites gives the developer a way to double-check if her idea is truly unique. On top of that, she may get a market overview and track current technology solutions.
Don’t forget to sign an NDA with your vendors and manufacturers. Particularly, mark which materials and information you pass to the manufacturer for production needs. Limit their usage to only your project.
3. Design Language Development for Consumer Devices
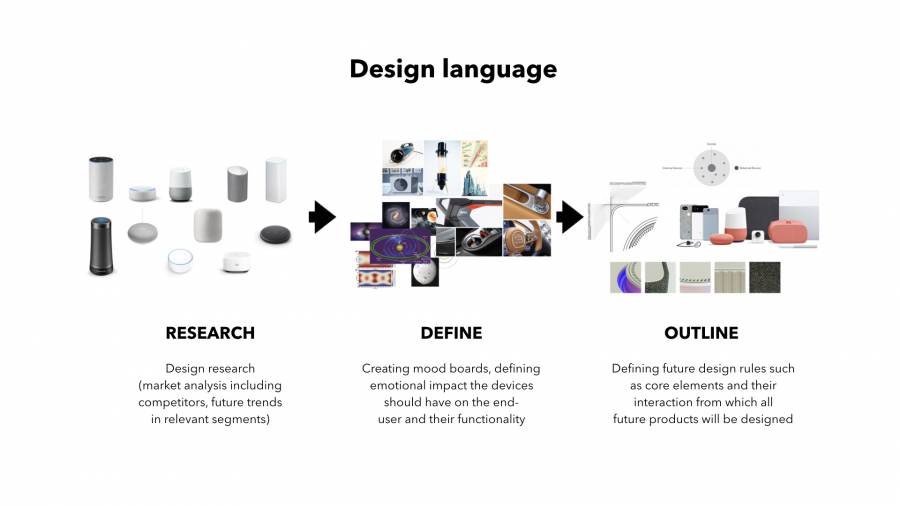
From our experience, many startups hurry to start prototyping, routing PCBs, designing enclosures, and sourcing factories. In fact, in order to create a truly high-quality and unique product, we recommend that you be patient. Take your time to develop a design language first.
Why do you need a design language?
Firstly, to create a unique, recognizable design that distinguishes your product from your competitors in the market.
Secondly, it is very important to integrate the appearance of your device with the brand of the company. The design language for devices is similar to the brand book in digital design. Your product should be perceived as consistent with interfaces, mobile apps, and other components.
Finally, you should set out the principles that will form the basis of industrial design for the entire line of devices.
What does the design language include?
1) The designers analyze existing products in the segment and hot trends in terms of their appearance and perception.
2) Then they create moodboards that include: sketches, colors, physical materials, and regular pictures that form the general. mood of the future product.
3) In the end, all the main distinguishing features, elements, and principles of the industrial design of devices should be described.
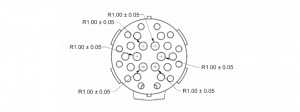
For example, the corner radius of Apple’s products is a fairly well-known design feature of their brand.
4. Design & Engineering of Consumer Electronics
When creating devices, at each stage, the hardware development processes are divided into several parallel streams that are tightly interconnected.
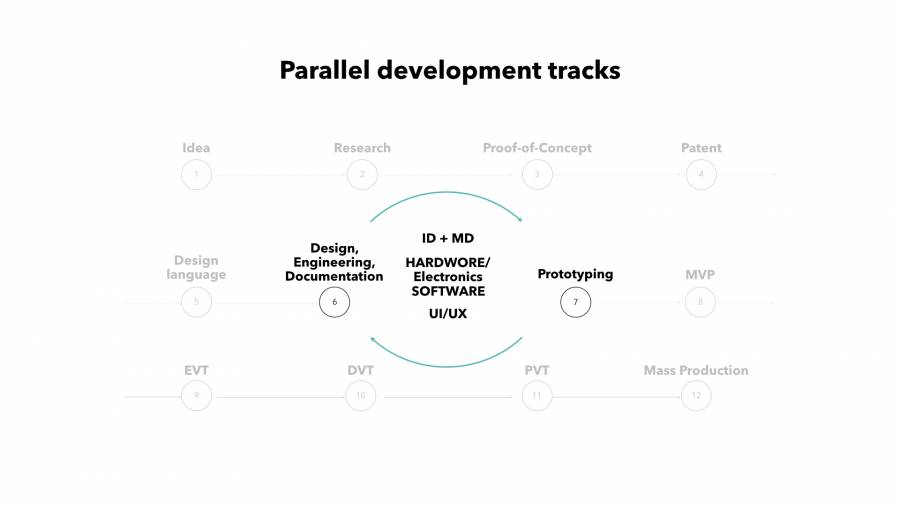
As for device development, this is the housing, PCB, and the huge stack of software; both the internal and external features of the device. Since we’ve talked about hardware development, let’s dive into more detail on housing.
Sketches, renderers, ID (industrial design)
Industrial design starts with sketching a product. This is a sketch of a future design that defines the general lines and shape of the device. The designers pick up successful sketches for further modeling and rendering.

As a rule, at the stage of conceptual modeling, we work out 2 to 4 variants of product ID (industrial design). The project team makes several non-functional prototypes called mockups. They are often printed on a 3D printer or sometimes cut out using machine tools. Requirements for mockups differ. Sometimes dimensional mockups are made at a 1:1 scale. Sometimes a prototype should look like the real thing, for example, with a real display.
After testing the mockups and their ergonomics, the team selects one of the designs for further work on ID
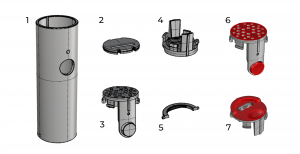
ID isn’t only a study of all the external elements of the hardware product, it is also the layout of all internal components. For example, in smart speakers, such elements are the speakers, a microphone matrix, and possibly a display or battery – everything that affects the size and shape of the device.
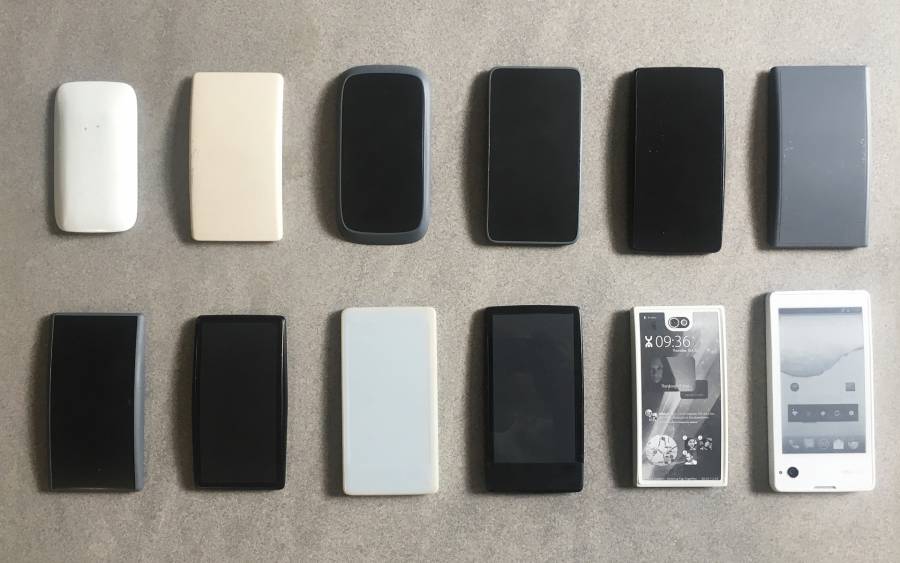
In the ID phase, the concept undergoes many changes. As an example, we include a photo that illustrates the evolution of the design of the YotaPhone, the first dual-screen smartphone with an E-ink display.
For this device, the product team carried out more than 30 iterations of industrial design to put all necessary components into the device.
MD (mechanical structure design)
The final phase to complete the flow of industrial design is MD (mechanical design or mechanical structure design). This phase undergoes development simultaneously with the start of production.
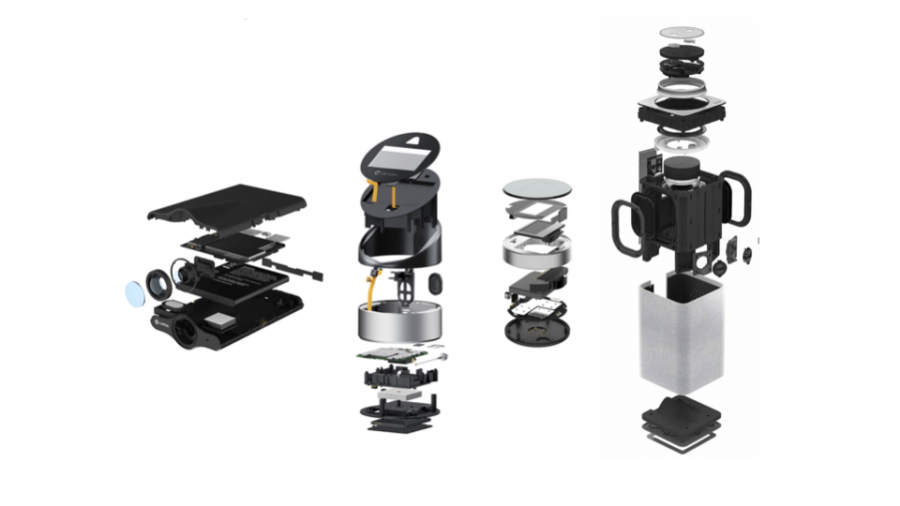
MD is a more detailed version of ID. Mechanical engineers finalize stiffening ribs, analyze mold-flow simulations, develop concepts for future product assembly, work on cooling circuits. Later, they create a 3D model to make a mold. This process is called DFM (design for manufacturing). DFM results in the creation of a parametric 3D model of the product, ready for production.
The DFM process has many stages from the creation of the first CNC prototypes to the last tooling iteration.
Parts manufacturing methods
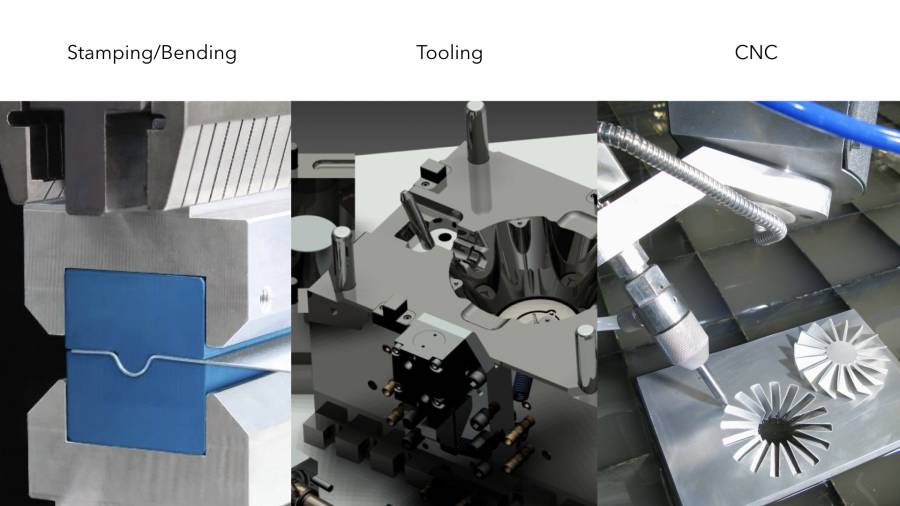
To create body parts, there are three main processes: stamping, casting (using molds or tooling) and cutting.
-
Stamping
Stamping is the low-cost method of transforming metal sheets into different shapes while under pressure.
-
Casting (using molds or tooling)
Casting is the process when molten plastic is injected into huge molds while under high pressure. After the plastic has taken shape, the parts get removed. The manufacturing of an industrial (solid) mold takes 30 to 50 days. On top of that, it is quite expensive. At the same time, the unit cost of the manufactured parts is low.
What do molds look like?
There are soft tooling and hard tooling molds.
Silicone or soft metals, such as aluminum are the main materials for soft molding. You can use them for a small number of parts, for example, for a trial. The service life of an aluminum mold is from a few hundred to a thousand sets.
Solid molds made of steel can achieve high dimensional accuracy of parts during casting. You can work with any type of plastic, as such molds can withstand high temperatures. By the way, this is the most popular method for manufacturing consumer devices.
Here is some advice – don’t pay the full cost of the molds. The common practice is a 30 – 50% advance payment when ordering a mold. Then you can pay the remaining balance after accepting the finished form and carefully checking the details produced with it.
It is better to sign a contract with a tooling house directly, rather than through a factory that will carry out mass production. This way you will retain ownership for tooling. In the future, this will allow you to change or duplicate the factory without changing the tooling manufacturer.
-
Cutting
Cutting (CNC), in contrast, doesn’t require investment in the mold, but the cost of the part is very high. As a rule, cutting is used for small or very complex parts that are not amenable to the above production methods.
PCBs
To match the PCB layout with the mechanical design of the device, design engineers and electronics engineers work together
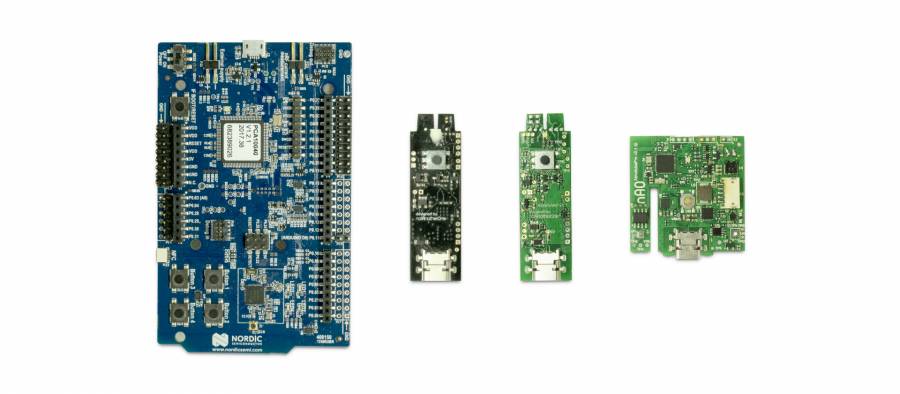
Below you see a possible evolution of a circuit board. Often, the first prototypes are assembled utilizing development kits (demonstration kits). Therefore, such demo boards with extra wiring would not correspond to the dimensions of the housing you need. According to the MD requirements, an electrical engineer adjusts the size of the board to the dimensions of the housing and the location of internal elements, such as connectors and LEDs. This may take several iterations
5. Hardware Development Documentation
Below you see a simplified diagram of the development of smart speakers. As the diagram shows, you need to take care of several subsystems at once. Correct and complete documentation is important to synchronize all task flows and requirements.
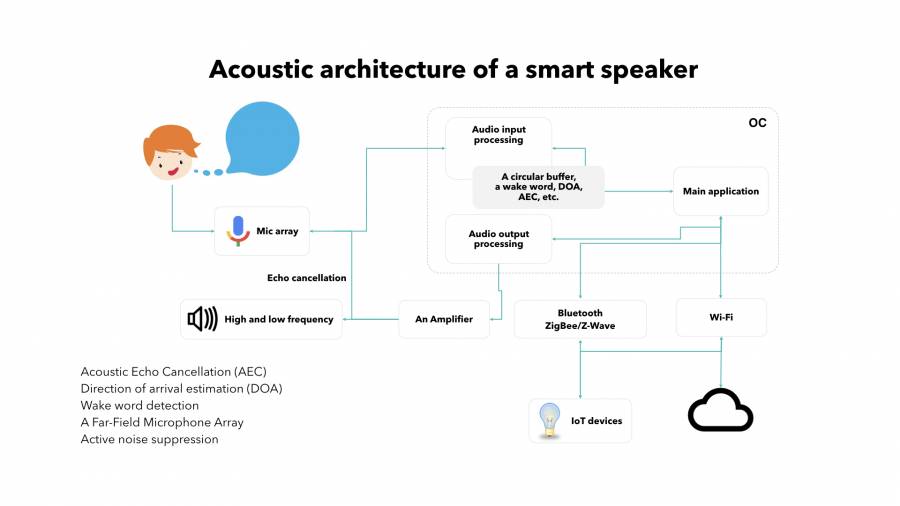
There are 3 main documents required for developing gadgets:
- PRD (Product Requirements Document) – a document with product requirements.
- SRS (Software Requirements Specification) – a document with software requirements.
- CMF (Colors, Materials, and Finish) – a list of materials, colors, and coatings.
PRD
PRD (Product Requirements Document) describes the device, all its technical characteristics, functional requirements, performance indicators, certification requirements, and so on. Its development begins from the moment you come up with the idea for the product. This document continues to evolve throughout all the production stages, including all new additions and changes to requirements.
Why is proper PRD so important?
It synchronizes the teams of engineers, designers, product experts, and business partners involved in the development.
PRD is also an annex to the production contract. The client accepts the first consignment of manufactured products based on the document.
Check the example of the main sections of PRD below:
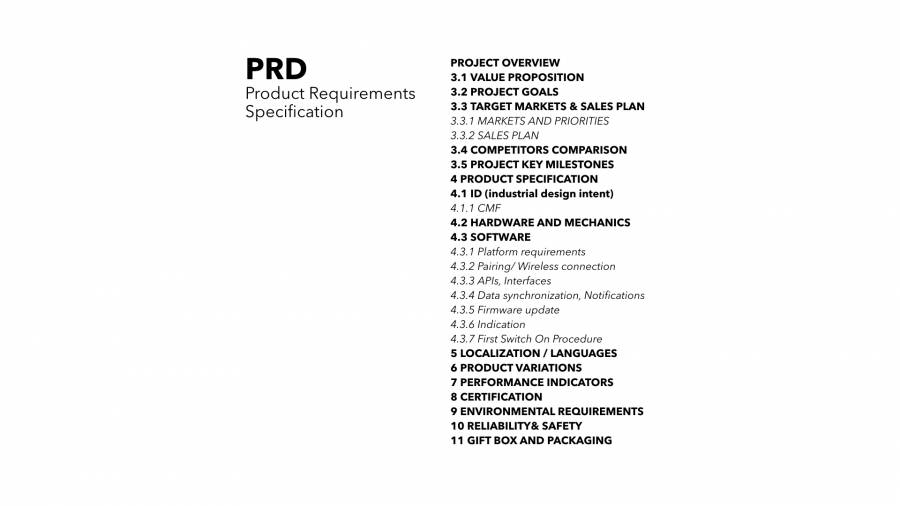
In addition, it makes sense to write down the requirements for prototypes manufactured at each stage; for example, which functionality you expect at the end of each iteration. We won’t talk about SRS here since we’re focusing on hardware development.
CMF
The next document is CMF (Colors, Materials, and Finish) which can be an independent document or be included in the PRD. This document describes the appearance of the device and the parameters of all its details: requirements for colors, materials, performance, and coating.
Below is part of the CMF document for the first-generation Atmotube, a portable air quality sensor, fully developed by our company [notAnotherOne.com].
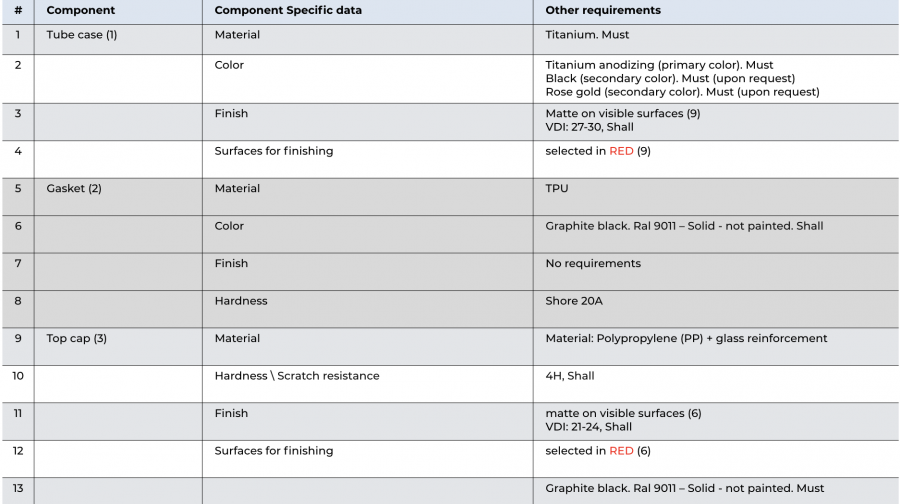
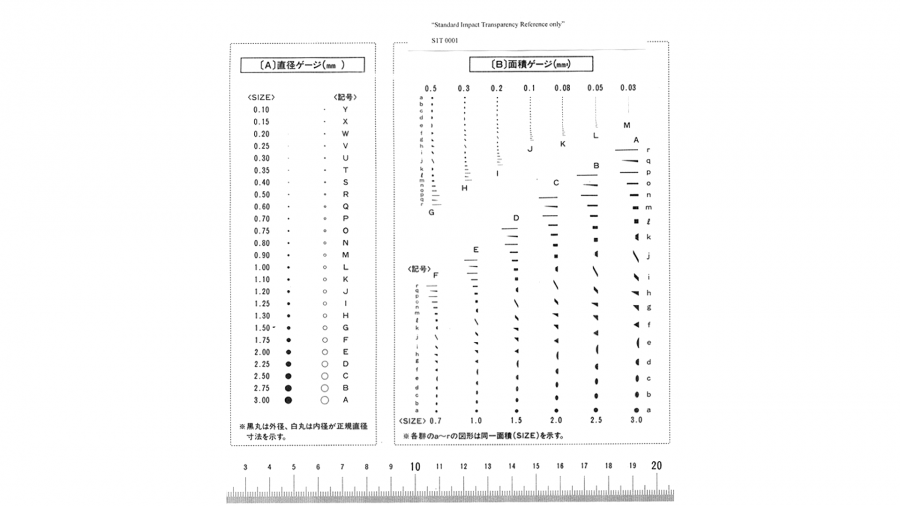
It also contains QAC (quality acceptance criteria) or CS (cosmetic specification). This is information on tolerances for the manufacturing of parts, for example, color, or minor surface defects such as small chips or scratches. Quality control in production and the documentation used when accepting finished products is based on these requirements.
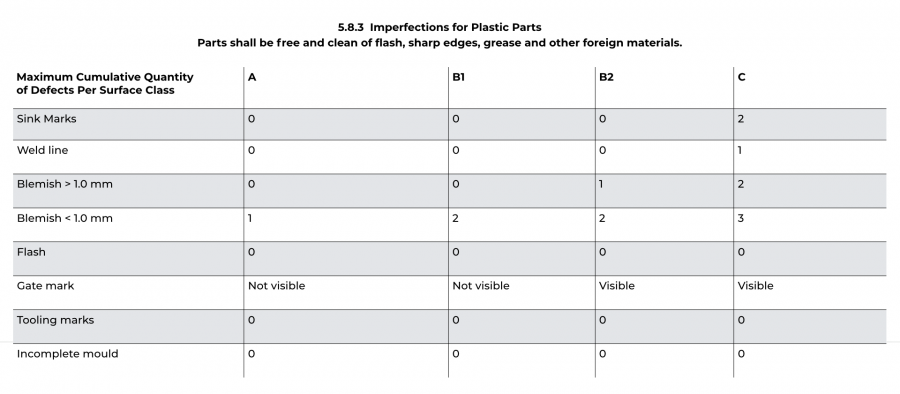
In addition to specifying the maximum allowable number of defects for each type of surface, the document clearly regulates the verification procedure (lighting, distance from the device being checked to the observer, etc.), and also describes the types of defects.
I hope that the above information and documents have helped to reveal some of the development processes for hardware devices.
