Are you a developer who owns a shiny new Samsung Gear S2 / S3 smartwatch? Do you want to build a simple application and deploy it to your smartwatch? Great. Let’s go!

But what are the steps you need to follow, beyond downloading the SDK?
It is not an entirely obvious process. There are gaps in the documentation, and I am unaware of any existing end-to-end guide.
So here’s everything that you need to do:
1. Install Tizen SDK on your desktop
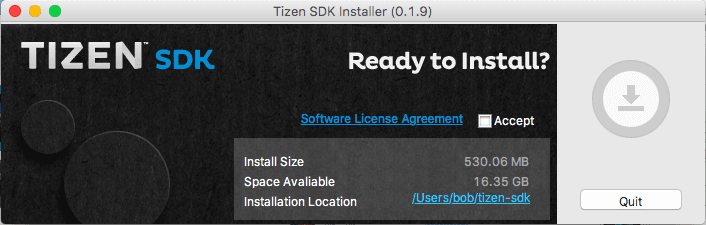
The first step is to install the Tizen SDK, which is available for Windows, OSX and Linux.
- Ubuntu 64-bit installer
- OSX 64-bit installer
- Windows 64-bit installer (NOTE – You will need to install Java on Windows to be able to run the Tizen SDK installer, and you will need the right version, which in this case is “Windows Offline 64-bit” from http://java.com).
The Tizen SDK contains command-line tools and an Eclipse-based IDE for building Tizen applications for various different device profiles. The matrix of Tizen devices and Tizen versions is quite a “headful” of information. I tried to summarize the situation following the Tizen 3.0 Milestone 1 releases in September 2015.
The Gear S2 uses a Tizen-2.3.1 runtime, so you need a Tizen SDK which supports that runtime version.
The Tizen 2.4 Rev1 SDK (released 1st December 2015) has added support for building 2.3.1 applications, in addition to 2.4 applications, which is great. Prior to that SDK release it was necessary to have multiple SDKs installed in parallel to be able to develop wearable (2.3.1) and mobile (2.4.0) applications on the same machine.
There were significant improvements made to the installer for the 2.4 SDK, so being able to use the same installation process for Gear S2 development too is a big step forward.
The new installer setup is a one-stop-shop, where there is a single download containing the installer and the content which that installer delivers. Previous installers had an awkward split between the installer and the content.
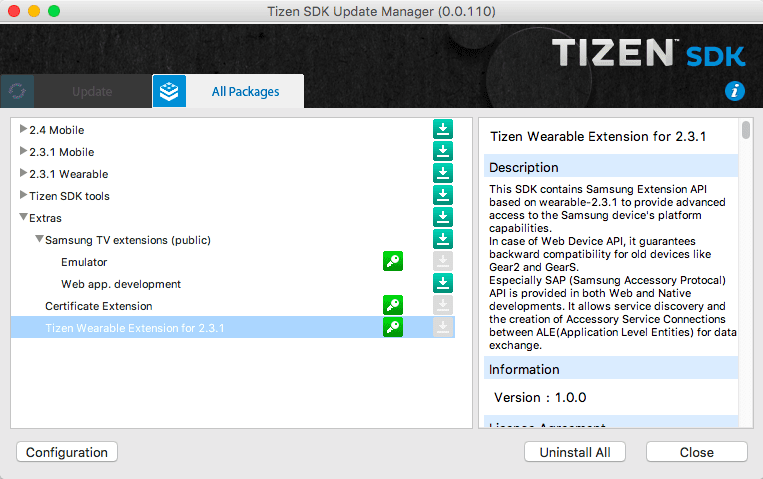
The Update Manager for Tizen works very similarly to the SDK Manager for Android, allowing additional SDKs and development tools to be added and removed when you have a working Tizen development environment.
No need to reinstall everything from scratch when new SDK versions are released. No need to download and install components which you don’t plan to use. For example, as of Tizen 2.4 SDK, you can add support for Tizen TV development as an extra component in Update Manager, where previously it was a completely parallel install process.
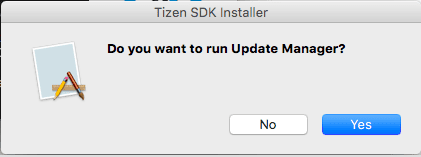
After the installer has completed, say “yes” to running the Update Manager immediately, because you will need some extra packages to be able to deploy to your device.
For our specific use-case in this article, you should choose Extras, and then add Certificate Extension and Tizen Wearable Extension for 2.3.1.
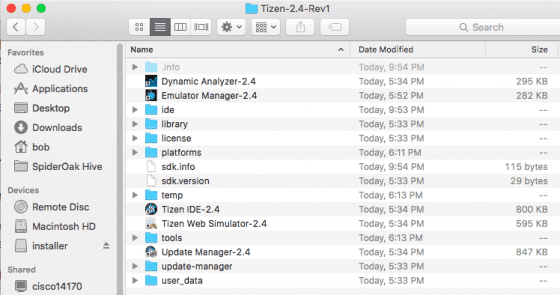
Here’s what you’ll see in the install directory following this process, on an OSX machine. The results on Windows and Linux will look very similar.
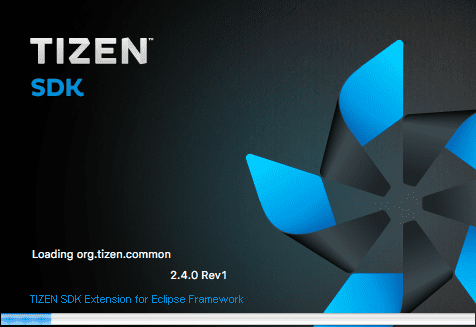
Launching the Tizen IDE, you’ll see a familiar loading splash-screen, if you’ve used Eclipse in the past:
2. Configure your smartwatch for development
Earlier Gear devices (Galaxy Gear, Gear 2, Gear S) used the physical USB connection between the desktop machine and the watch for development. That was possible because they all had charging cradles with a micro-USB connection.
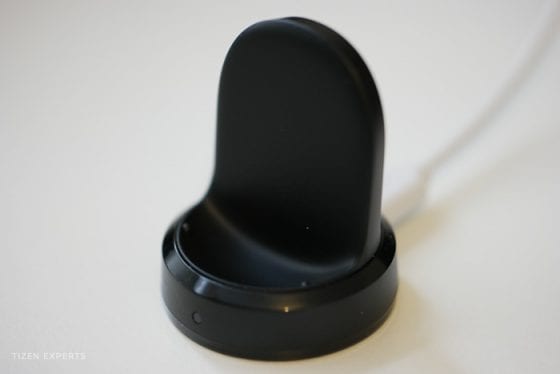
The situation is different for the Gear S2 because there is no wired connection anymore. Charging occurs via the wireless Qi inductive charging stand.
Debugging now occurs via Wi-Fi.
Your desktop machine and your watch must be connected to the same Wireless access point, and debugging must be explicitly enabled on the watch.
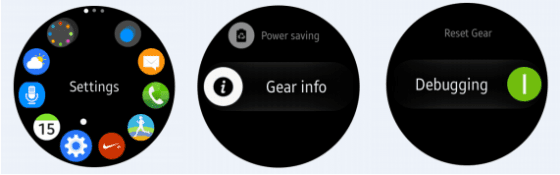
- Swipe right, then select Settings.
- Scroll down to and select Gear Info.
- Scroll down to Debugging, and select the grey circle.
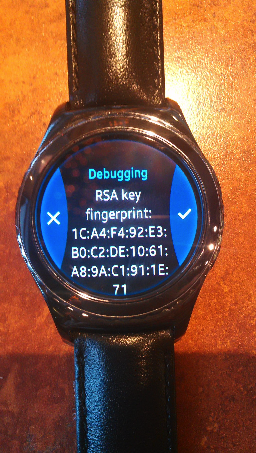
- A dialog will appear which says “Allow Gear to read log data, copy files to and from your PC and install apps without notification (development only)”. Click on the tick, and the grey circle on the previous dialog will become green.
- Your watch is now in “developer mode” and is ready to talk to your desktop machine.
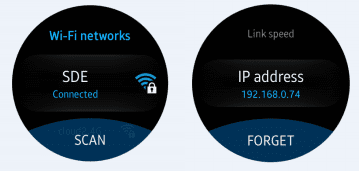
- Go to Settings | Connections | Wi-Fi and turn it on, if it isn’t already on.
- In the Wi-Fi Networks menu item for the network you are connected to, there is an IP address menu item.
- Note the IP address. You will need that.
- See “Guidelines on Connecting a Gear S2 Device Using Wi-Fi”
At this stage you are going to want to drop into a command-line shell (cmd.exe on Windows, Terminal on OSX, etc) where you can use the SDB tool to connect your desktop machine directly to the watch over Wi-Fi. It is possible to do this setup within the IDE, but you don’t want to do that.
SDB (Smart Debug Bridge) is a “homage” to Google’s ADB (Android Debug Bridge) which even seems to share some of the underlying protocols. SDB can connect to my Android Galaxy S6 phone, for example.
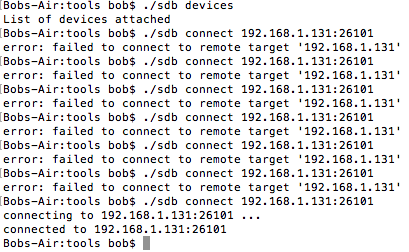
SDB is installed in the tools directory under the Tizen SDK which you just installed.
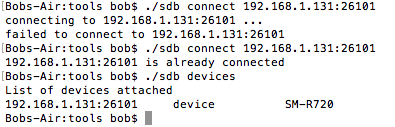
NOTE – See that “failed to connect”, and then “is already connected” when trying again? That kind of connection flakiness is something you will get used to.
On the watch itself you will need to confirm the connection:
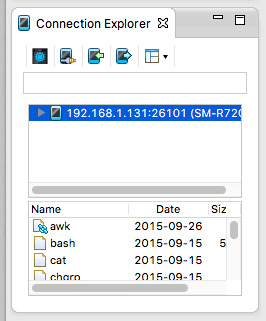
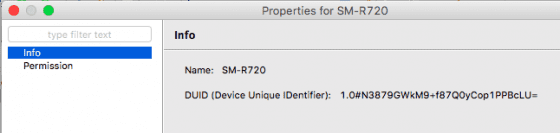
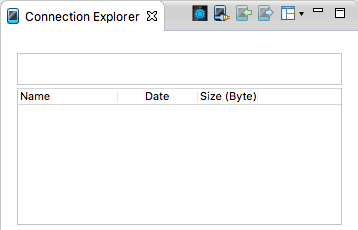
When you have the device connected, it will pop up in the Connection Explorer in the IDE. The Explorer allows you to browse the file system on Tizen devices, to move files to-and-from devices, inspect logs and various other operations. Our next step is to get the unique identifier for our device.
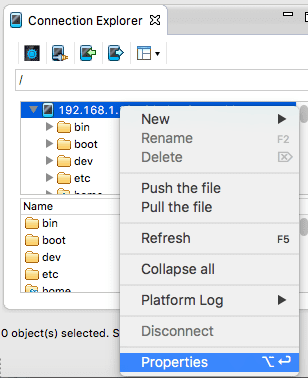
- Right-click on the device in Connection Explorer
- Selecting Properties from that context menu
- You will see the DUID (Device Unique Identifier) on that menu which is required to deploy your own applications to that device.
NOTE – Where has it gone? The Wi-Fi connection with the Gear S2 is very, very flaky. As I was writing this article, my connection spontaneous disappeared. This will happen to you too in all likelihood.
When it does, you are going to need to keep the command-line window open, to repeatedly re-establish that connection when it breaks:
Seventh time lucky and we’re back in business 🙂
3. Work your way through certificate requests
The Certificate Extension which was added in the Update Manager a long, long way back in these instructions makes the following icon appear in the Eclipse IDE which can be used to register the various certificates which are required to deploy applications onto your own smartwatch:
![]()
Fair warning: This is a tedious and extremely annoying process. If you have ever done any iPhone development, this will feel similar to the much hated iOS “provisioning” process. There are multiple steps. It is very manual. You will be flipping between websites and e-mails and IDE and file system. All of this pain must be tolerated just to be permitted to deploy your own executables to your own device. This is the ugly reality of the security model which iOS and Tizen use. It is not fun.
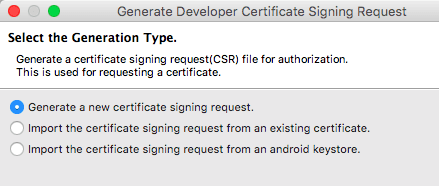
First off, you will need to generate an author certificate for yourself as an individual or corporation. Click on the certificate icon in Eclipse, and you will see the following dialog:
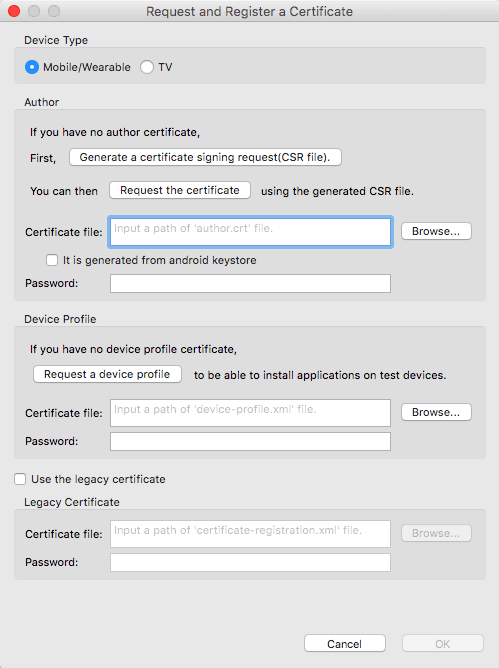
Click on the Generate a certificate signing request (CSR file) button. On the following dialog, select “Generate a new certificate signing request”, and then fill in the required details:
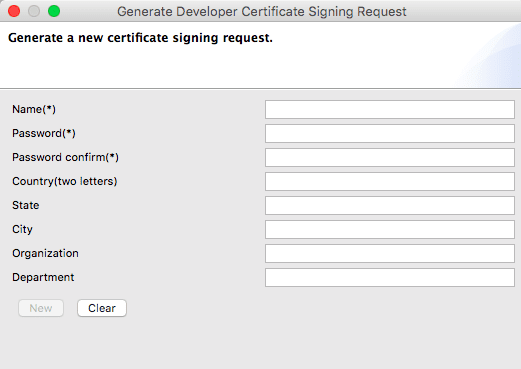
As you can see with the asterisks, you can get away with Name and Password as a starting point for an author certificate. For certificates which will be used to actually submit applications to the Tizen Store the other fields will be needed.
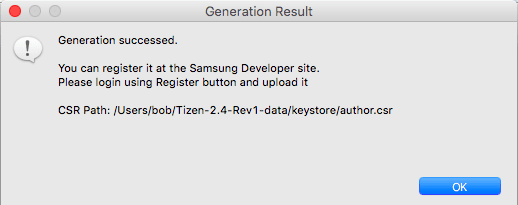
As the dialog which pops up next appears indicates, a .CSR file has been generated in the keystore directory under the IDE installation, which can be registered at the Samsung Developer site.
Returning to the Request and Register a Certificate screen, you will now click on Request the Certificate button which attempts to open a web-page connecting to the Samsung Developers site:
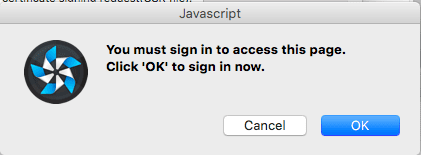
If you don’t already have a Samsung account then you will need to create one. Then you can login, and move to the next step which is to upload the generated CSR file to that webpage, and then wait to get an e-mail back.
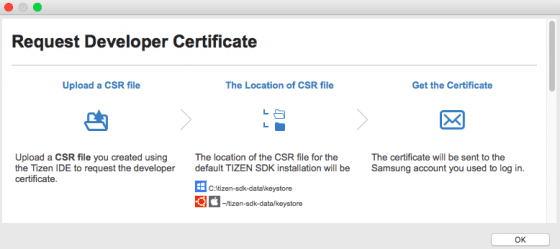
You will get an e-mail back shortly afterwards with a .CRT file attached, which is a certificate signed by Samsung containing those author details.
The developer certificate is issued for you.
Please find an attached certificate
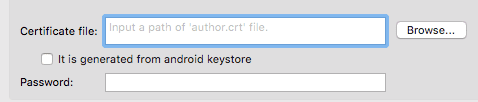
Back in the IDE you need to browse to that file (which you probably want to copy into your keystore directory) and enter the password.
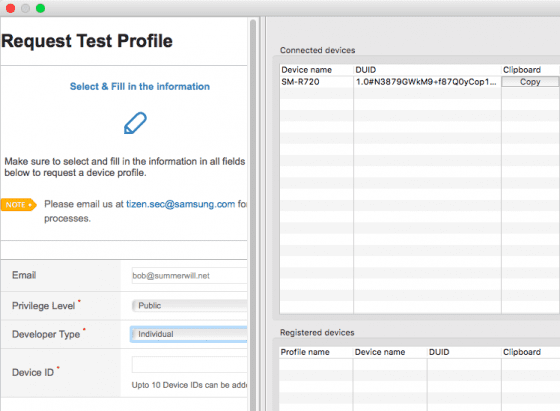
Next we can move on to the Device Profile, and obtaining a certificate for your specific device. Click on the Request a device profile button.
Again this will log you into a webpage using your Samsung account. Choose Public and Individual, and cut-and-paste your DUID from the right-hand panel to the left-left panel and click OK.
Again, you will be mailed another text file, this time a device-profile.xml file, with an associated password. That should probably also be copied to your keystore folder.
Dear developer,
We’re attaching an issued device profile per your request.
The following password is needed when the device profile is registered.
Back on the Request and Register a Certificate screen, you can now browse to that device-profile.xml file, enter the password you were sent, and we’ve finally got to the point where we can press the OK button at the bottom!
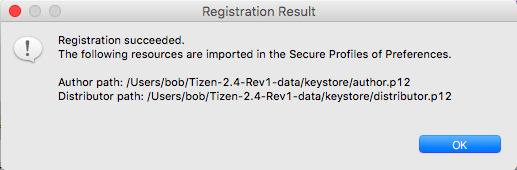
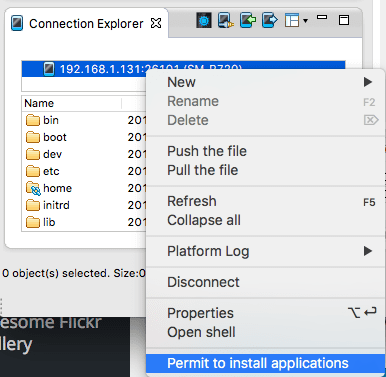
Having gone through all of this song-and-dance, we are finally able to click on the Permit to Install Devices item for the device in the Connections Explorer which pushes the two certificate files to the device and means that you can finally start using the device.
4. Finally deploy a test application
When you have finally worked through all of this “song-and-dance” you will be in a position to start working within the IDE, in a manner which is very unsurprisingly and not worth me writing further about here, because it is covered in detail in many other places.
Head over to the Getting Started guide on Tizen.org, for example.
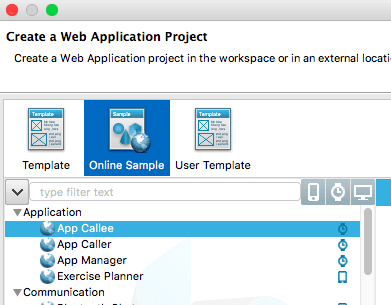
And then you want to Run as Tizen Web Application, which can take several minutes. It moves to 60% very fast, and then usually creeps up to 62%, 64%, 66%, 68% and then jumps to completion.

Wrap-up
That was a pretty long and painful process, wasn’t it?
That is the reality on-the-ground for Gear S2 developers, with the certification process being a particular pain point, and I seriously doubt that will ever get much better.
The flakey Wi-Fi is something which should be addressable. If anybody can push that information in a useful direction for the Gear S2 product support teams, please do!