The Heartbleed bug has made April into a difficult month for Internet users, as we scramble to change our passwords and protect ourselves from the most pervasive security threat in ages.
But if you’ve set up your own virtual private network (VPN), which gives you a secure channel back to your home network even on insecure public networks, you don’t have to worry, right? Unfortunately, that’s not necessarily true.
See also: Building A Raspberry Pi VPN Part One: How And Why To Build A Server
OpenVPN is an open source service that makes up the backbone of many independent VPN servers, including the one I built for a ReadWrite tutorial. Since OpenVPN uses OpenSSL as its default cryptography library, it can be vulnerable to the Heartbleed bug. That means a dedicated hacker could conceivably steal the master key that encrypts all connections to a particular OpenVPN server, essentially shredding its security (although doing so doesn’t sound particularly easy).
Users that followed our ReadWrite tutorial probably aren’t vulnerable to Heartbleed, and in fact, may be safer than the average user. That’s because:
- We published our tutorial after the discovery of Heartbleed, so anyone who followed it should have installed the Heartbleed-patched version of OpenVPN.
- We used a TLS-auth key, considered by some VPN builders to be an unnecessary security step. Generated in step eight of the tutorial, the pre-shared hash-based message authentication code (HMAC) key doesn’t just ward off DOS attacks, but also any bad actor who doesn’t know your private key. Even the OpenVPN wiki page on Heartbleed says the a TLS-auth key can make you less vulnerable.
Still, there are many reasons it’s a good idea to check your VPN for Heartbleed vulnerability, just in case. Fortunately, one programmer, Stefan Agner, has already developed an open source program that tests OpenVPN for you. You can access Agner’s code on GitHub.
Here’s how to download his program and test your OpenVPN-powered VPN for the bug:
1) First, you need to access wherever your VPN lives, whether that’s on your computer, a server, or a Raspberry Pi like in the tutorial. So in my case, I used SSH to access the Raspberry Pi where my VPN was built.
See also: 5 Pointers To Supercharge Your Raspberry Pi Projects
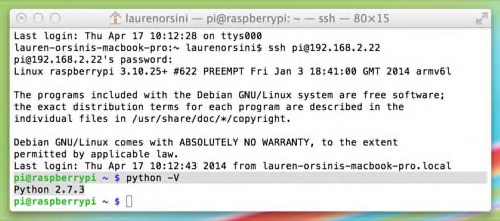
2) Once you’re in, the first thing you need to do is make sure you’re using the right version of Python. This script requires Python 2. So type:
python -V

If it results in a version that starts with a 2, you are set. If not, you’ll need to install the latest version of Python 2 with:
sudo apt-get install python 2.7.3
3) Now you need to clone the Heartbleed test GitHub repository. Obviously, you need git installed. You can type “which git” to check if you have git already installed, and if so, which version. If it isn’t already installed, you can type:
sudo apt-get install git
As long as it’s the device on which your VPN is installed, any directory will do for this clone—I just used the default folder on Raspberry Pi. When you’ve picked one, type in the command:
git clone https://github.com/falstaff84/heartbleed_test_openvpn.git

4) Now it’s time to finally input the test command. Go into the folder you just installed:
cd heartbleed_test_openvpn
Then, run the command, calling your internal IP address—the same one you used to connect to on SSH. For me, that was 192.168.2.22, as shown in the example. Yours is probably different.
./heartbleed_test_openvpn.py 192.168.2.22

5) If your VPN is not vulnerable and you have a TLS-auth key, nothing will show up at all. The program is attempting to take advantage of Heartbleed and if it can’t, the program won’t work. It’s the one time you want your program to fail.
If your VPN is vulnerable, a fake Heartbleed attack will pop up. If it turns out your VPN is vulnerable, the only thing to do is to install the latest version of OpenSSL (Or OpenVPN, if that’s the backbone you’re using).
Let us know if this works for you, and we’ll do our best to lurk in the comments section to see if we can help troubleshoot. Best of luck.


