Google Chrome is the most popular Web browser in the world. Part of its appeal comes from its ability to let you fully customize your browsing experience with a slew of extensions. Extensions are small, lightweight programs that personalize your Chrome installation with new features.
You’ve probably already downloaded an extension or two. But did you know it’s almost as easy to build your own? Chrome extensions are written in a relatively beginner-friendly language—JavaScript—and require only two files to function.
Since they’re so easy to build, there are currently more than 53,000 extensions in the Chrome Web Store, ranging from productivity tools to stupid entertainments.
Today’s Project
Today we’re going to build a Chrome extension that isn’t particularly useful, though it’s sort of funny. We’ll be transforming Steven Frank’s Cloud to Butt Plus extension, which edits every Web page you visit by replacing the phrase “the cloud” with “my butt.” You can judge the results for yourself.
With Frank’s permission, we’ll be creating a derivative work out of his Cloud to Butt GitHub repository in order to build a “find and replace” extension of our own.
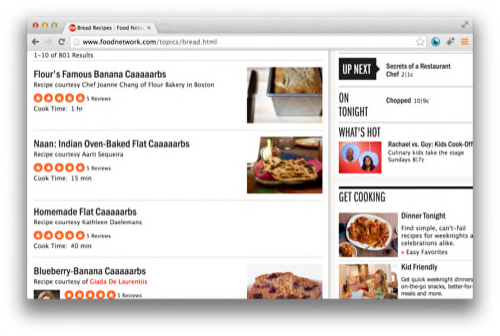
Since I rarely build a coding project that isn’t trolling my coworkers in some way, my example envisions the Web the way my Paleo editor Owen Thomas probably sees it. The Paleo diet puts carbohydrates off limits, so I decided to make his dietary choices simple by making “bread,” “pasta,” and related taboo foodstuffs less appealing to him on the Web.

My finished extension is on GitHub for anyone who wants to use it. Here’s how it works.
Anatomy Of An Extension
Extensions piggy-back off of existing Chrome functionality to add new features. This means anyone can build an extension using HTML, CSS, and JavaScript, without having to learn to work with Chrome’s native code. As the Chrome Developer site promises:
If you’ve ever built a web page, you should feel right at home with extensions pretty quickly.
That’s quite an assertion, and it certainly depends on the complexity of the extension you want to build. Still, all you need for a basic extension are these:
1. A manifest.json file. Here, .json stands for JavaScript Object Notation. This manifest file stores metadata about our extension and shows Chrome how to use it. Every manifest file includes the extension’s name and description for Chrome Web Store browsers. After that, it declares dependencies, permissions, and any browser actions the extension will perform.
2. A JavaScript or HTML file. Here’s where you write the program detailing what your extension does. In the example the Chrome Developer site gives, it’s popup.html, a page that delivers cute cat photos to extension-users. For more complex extensions, it’s a JavaScript file containing a program that delivers the meat of the extension.
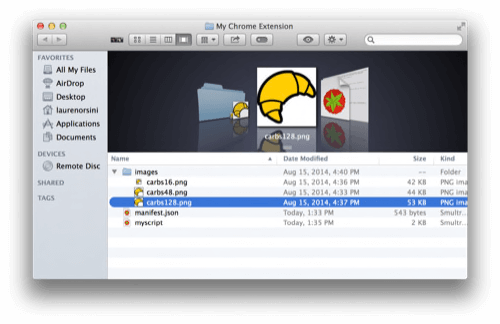
3. An icon. Actually, this is optional, but it’s helpful and certainly looks cute when your extension is installed. For best results, save an icon as three square images at resolutions of 16px, 28px, and 128px.

Building Manifest.json
At its very minimum, a manifest file needs only to include a name and a version. At 17 lines, ours does a little more. (Here’s the full thing in one place.)
This part includes all the metadata:
{
  "manifest_version": 2,
  "name": "Caaaarbs",
  "version": "1.0",
  "description": "Paleo's best friend.",
  "icons": {
    "16": "images/carbs16.png",
    "48": "images/carbs48.png",
    "128": "images/carbs128.png"
    },
Manifest_version refers to the version of the file format we’re using. Chrome requires that you use version 2, so that’s what we’ve indicated.
Next comes the extension name, version, and description. These are really up to you.
After that, I listed out the extension’s icon sizes. First, I picked an image that I thought fit my extension—a royalty-free vector graphic of a croissant—and then sized it in Photoshop three times. Now, Chrome automatically puts the correct size of the icon where it is needed.
Here’s the rest of the file:
  "content_scripts":
  [
    {
      "matches": ["*://*/*"],
      "js": ["myscript.js"],
      "run_at": "document_end"
    }
  ]
}
These are the content scripts that make the extension tick. The first one here simply indicates that my extension will do its thing on any website. Under different circumstances, you could edit the asterisk wildcards to limit use of the extension to particular pages—you know, like https://readwrite.com.
The second line indicates that manifest.json will read in the extension’s underlying program from a JavaScript file named myscript.js. That’s where the whole “find and replace” function lives.
Finally, the third line instructs my extension to run after the full page has loaded in the browser window. If it ran before I brought up a site, some of the words I want to find and replace might not have loaded yet!
Building Myscript.js
This file may be 40 lines long (see it here), but it’s mainly home to two JavaScript functions. In programming, a function is a reusable bit of code that performs a specific task.
The first function, called walk, executes an action that JavaScript programmers refer to as “walking the DOM.” DOM stands for Document Object Model, which is a code-based representation of a Web page and every element—text, images, form fields, and so forth—on it. It sort of resembles an upside-down tree, with a single trunk at the top and a bunch of ordered code “branches” below.
The walk function explores the whole tree, starting at the trunk and moving down to the end of the first branch, then back up until it finds another branch to examine. Basically, it’s crawling all the data on the page to locate the textual elements.
That’s where the second function, handleText, comes in. When walk finds some text, handleText scans for the words we want to replace, and then replaces them wherever it finds them.
How does it know which words to replace? We specified that this way:
v = v.replace(/bbreadb/g, "caaaaarbs");
This is one of the five lines that specifies the words I want to swap out. You can choose any number of words for substitution, though each one will need a line like the one above. (It’s not the most graceful program ever written, but it is straightforward.)
Some technical details, for those who are interested: “v” is a variable that stores a temporary copy of “textNode.nodeValue=”—i.e., the text in a particular text element called “textNode.” The function v.replace rewrites the text in that element by replacing the first string (everything inside the parentheses before the comma) with the second string (the word “caaaaarbs”). The first string in the example above is a dense bit of code that identifies all text matching “bread” and then instructs the function to replace every word that is a match to this one.
At the end of the function, the temporary value stored in “v” gets copied back to “textNode.nodeValue” and then written into the code representation of the Web page—which then displays your change in the browser.
Uploading to Chrome
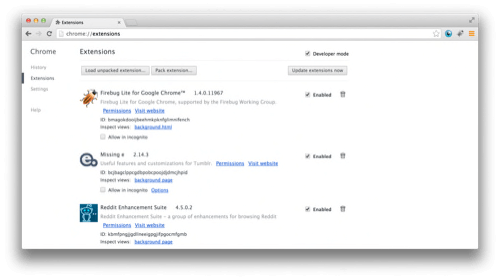
Collect your manifest.json, myscript.jpg, and your icons in a new folder by themselves. Now, navigate to chrome://extensions/ in your browser window.
Now, click the checkbox to put Extensions in “Developer Mode.” This will give you a few more options regarding what you can do with your extensions.

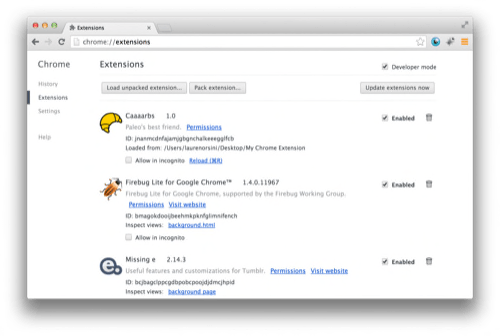
Click “Load unpacked extension…” and navigate to your Chrome extension folder. If all is well, it should upload without a hitch. If it returns an error, there’s most likely a syntax error in your code, so check it and try again.

Success! The image above shows my extension among others I’ve installed.
Now check out all the code to my extension on GitHub, clone your own copy, and make your own find-and-replace extension. I used this to prank my editor, but the possibilities are endless! You could prank your family or friends, too. Or you could even—gasp—use the find-and-replace action to create something useful!
In any case, I’d love to see what you build. Tell us all about it in comments.
Engineer Jack Lawson contributed to this article.
Top photo by Darren Harve; all screenshots by Lauren Orsini


