If the music from your headphones sounds only in one ear — don’t rush to throw them out. Most people have experienced getting a pair of headphones only to have them stop working — especially on one side. You’ll find that your headphones are easy to fix and it’s quite fun, too. Most damage occurs while your headphones are still good. Here is how to fix your headphones for yourself — a step-by-step guide.
Damaged contacts on your headphones can be sealed — especially on the plug.
Surely you are familiar with this situation: you put on your headphones, anticipating the enjoyment of your favorite tunes – and that’s all: you don’t hear anything. Or only one earphone works, which is even more annoying.
If such problems occur, in most cases, you can slightly twitch or tweak the cable at the plug or gently squeezing the base until the sound goes from both channels. This may help for a while — but you usually have to continually fiddle around with them to keep them working.
The easiest solution, in this case, is to toss these in the trash and buy new headphones. That option is not bad, but what if the headphones you bought are not some ordinary headphones? What if this time you bought expensive, high-quality headphones, or they’re your most beloved and wonderful ones?
There are thousands of headphones to choose from. Research claims that the headphones market will reach $16B by the end of 2020. Now, you’ve bought an earphone by spending hours of your precious time, comparing them, reviewing them and a lot more. Do some careful research before buying a pair of costly earphones because you’ll likely leave them somewhere, or your buddy will borrow them.
Remember that the annoying issues with headphones usually don’t indicate a breakdown of the headphones themselves.
You’re facing some kind of small damage to the contact, cable or connector plug on your headphones.Replacing the plug is not very difficult and expensive. If you contact the master, you’ll just be asked for money for fixing your headphones for a simple fix you can do on your own.
If you do careful work and your hands do not tremble, you can do everything yourself at home.
You’ll have a little preparation for the repair. There are a few components you’ll want to buy — but then everyone will be coming to you to have their headphones fixed.
Standard contact plugs are sold in electronics stores for less than $100. A new plug always required a solder to the wire. Of course, there are models that screw and tighten, but for headphones that are used with mobile devices, I don’t recommend them.

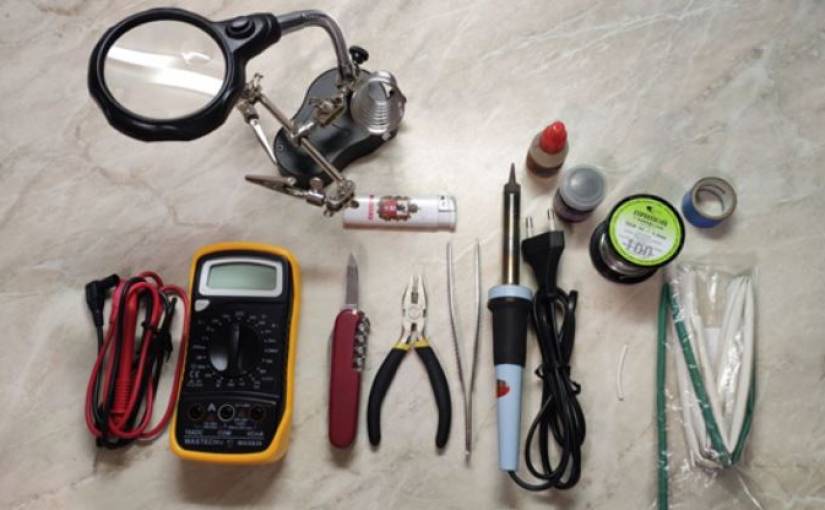
For repairs, you’ll want a soldering iron, solder. Read the directions and practice with these so that you’ll have the skills to work with them. To enhance the effect of the fix, find a piece of heat-shrinkable tube for insulation of live parts. The tube should tightly enclose the cable, while also providing mechanical protection.
In principle, a heat shrink tube is the same as electrical tape, but it is much more convenient, and the reliability is higher.
Looking for the cause of the damage.

Usually, your headphone cable will be breaking right in the middle, or higher up toward one end. The cause of the breakdown is almost always a plug, which, when used regularly, is subjected to mechanical stress much more often than other elements of the headphones. Just squeeze and pull the wire in the area of the plug.
If you can hear a sound after manipulating the wire a little, then you have located the malfunction.
Simply cut off the old plug — because you will no longer need it. If you find the distance between the cliff and the flexible part of the plug is about a few cms — there’s a good chance that it can be fixed.

To accurately determine the location of the gap, you can use the tester in the resistance measurement mode (Ohms).
Touch one end of either of the pins of the plug (the left or right headphone output is the two extreme pins) and attach a simple needle to the other probe. Then, gently stick the probe into the wire a little further from the intended place of the gap.
If instead of 1 (one), the tester shows a value of 0 (zero) or a little more than zero (a value with hundredths or tenths), then a gap has occurred in this wire. You have located the problem. This is where you are going to fix your headphones.
Remove the insulation.

You can get wire strippers at your local hardware store, or just use a small pocket knife. Pickup your sharp pocket knife or wire strippers, and carefully remove the insulation from around the end of the cable. Move slowly and only take off a few centimeters.
Now, separate the three wires from each other. Take your heated soldering iron — and for hell sake — don’t burn yourself. Burn those three wires — carefully — with the soldering iron. You’ll get a colored insulating coating from their very ends of the wires.
Prepare the ends of the cable.

You’ll want to put on a new plug cartridge, a flexible tube, and the cable. It will be easier to solder if you first individually tear the ends of the wires that you’ve already stripped.
Now, solder and fix.
Before you start soldering, it is useful to study the design of the stereo-pin contact plug. The headphone cable contains three wires: the right channel (usually red), the left channel (green, white or yellow) and the ground (in our case, usually copper).
On a mono headphone plug, there is no right-left channel separation. Depending on the plug, the solder contacts will be of different sizes. Try not to create electrical connections between the contacts during soldering. Be especially careful with the ground, otherwise, when headphones are connected to the device, it will short-out (called a short circuit). Be mindful not to expose the ends of cables more than you need to for soldering.
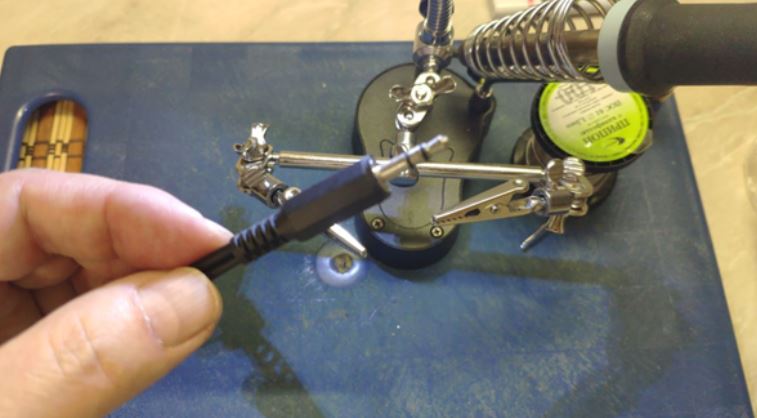
According to the photo below — solder the three wires to the contacts of the new plug. Then, move to the part of the cable that doesn’t have insulation. Carefully and slowly heat the insulation around the wire with the soldering iron, until the insulation snugs up, and completely shrinks around the wires.
Fasten the cartridge.

Next, you’re going to do the plug cartridge. Hold gently and carefully, so as not to damage the results of the work you’ve already done. Now, move the wider plastic tube to all the joints. Push the cartridge in place (as seen in the photo) and screw it tightly onto the plug. This needs to be tight enough so that the cartridge won’t subsequently unscrew spontaneously.
Now, you’ll check for quality.
Upon completion of the operation, you’ll want to check the performance of your repaired headphones.
Connect your headphones to any player you usually use them on — your smartphone or stereo system. Turn up the tunes and enjoy your music.
Conclusion
Once you’ve practiced a little you will become fast at fixing headphones and everyone will come to you. You may have a little freelance business on the side.
